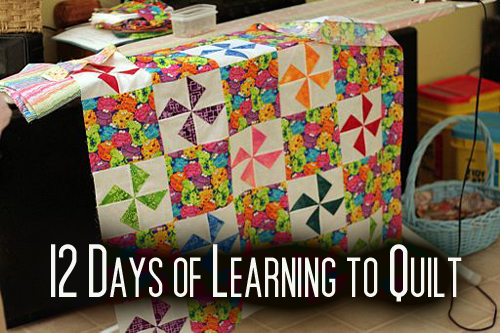
Learning anything new always takes time and patience. Learning to quilt is no exception. Here are the 12 days of learning to quilt that I used to help a friend make her first baby quilt.
Day 1 – Think back to the days of learning to drive. You just don’t jump into the driver’s seat and take off. Learning to drive is more than putting a car in gear and heading off down the road. There are rules of the road, parts of the car, and much more to learn as you practice one step at a time. Learning to be a good quilter is much the same, especially for anyone, like my friend, who never used a sewing machine before. Her first lesson involved a tour of the sewing machine. Parts of the machine, learning how to thread and fill bobbins, plus a small list “quilting must dos.” were on the initial day’s learn and practice list.
Day 2 – Using a bridge when chaining pieces or sewing quarter inch seams are so basic to many of us who sew, but to the beginner these must be taught. Included in this beginning lesson was how to be sure to knot the beginning and end of the seam, so it does not unravel. This lesson on how to quilt was basic skills of sewing.
Day 3 – Once we decided to use the basic quilt pattern of a 6 inch block and figured out the yardage, we went shopping for fabric. After choosing multiple cottons that blended from one side of the color wheel and one color that crossed the wheel, plus backing material and the batting, our next lesson involved how to cut the yardage into the squares.
Day 4 – Mastering the cutting wheel and rulers are important skills so that all pieces are cut perfectly square. Each yardage of material slowly became a pile of 6 1/2 x 6 1/2 inch squares for the baby quilt.
Day 5 – This step led to positioning those 6 inch pieces on the design board to determine the pattern of the baby quilt. Though there were 6 different colors and patterns, a decision as to the placement of the blocks can be a challenge. Once the blocks are positioned, stand back and squint to view the baby quilt design. Check for duplicate blocks in the same row or column.
Day 6 – The following lesson was to begin sewing the squares together into rows. Each pieces needed to be pinned starting from one end, then the other, and finally securing the center. As a beginner to this process, learning to place the pins so that the machine did not roll over the pin, yet it secured the material in place was important. Taking time to pin and sew slowly helps to keep that 1/4 inch seam allowance. Once each row is sewn, the rows are then sewn together to finish the baby quilt top.
Day 7 – For the beginning quilter, there is great pride in that first quilt top. The next lesson will be how to sandwich the quilt top, batting and backing to prepare for hand quilting. Place the backing material either on the floor or large clean surface area with the right side down. Place the batting next and quilt on the top. These will need to be centered on the backing material and placed into the quilting frame. Since we were hand quilting, this quilt was going to be placed into a frame for stretching and pinning. Once pinned hand quilting can be completed on the lap.
Day 8 – Learning to stretch and pin the quilt in the frame is important so that the backing has no puckers, and it is always at right angles with the top. This guarantees that the two parts will maintain alignment as the quilt is moved to continue pinning.
Day 9 – Once these three layers are inserted into the frame, use the curved pins to secure the layers in place. Placing a pin about every 2 – 3 inches will be sufficient. Do not try to close the pins while on the frame. It is easier to close the pins, once the quilt is removed from the frame.
Day 10 – The next step is to actually do the hand quilting on the lap. The pins have secured the layers and have kept the quilt top stretched securely for the hand quilting to be completed. As each section is finished, remove the pins. As you prepare to store the pins, do not close them. Keeping them open will make them ready for easy use on the next project.
Day 11 – The binding of the quilt is next. Once you are ready to sew the quilt binding, place the binding on your lap. Allowing the binding to hang off the edge of the sewing machine table may cause it to stretch. Avoid beginning or ending your quilt binding in the exact center of the quilt. Every time you fold the quilt it will weaken the quilt binding in this spot. The same would be true for other locations on the binding where folds are possible. If the seams where the binding strips are joined have bumps or are lumpy, the problem may come from your iron. You want to make sure you have flat seams when you make quilt binding. Sew the folded binding to the right side of the baby quilt, flip to the back of the quilt and hand sew with a blind stitch.
Day 12 – The day finally arrives for my friend to enjoy her new baby quilt. Her first quilt project is complete and she is hooked on quilting. Back to the quilt shop for more material and a chance to practice these 12 days of learning to quilt again.
Come and choose one our handmade baby quilts, a lasting keepsake, a unique baby shower or Christening gift for boys and girls. Each baby quilt is made of 100% cotton baby flannel and can be machine wash and dried.
These memorable unique handmade baby quilts will be treasured gifts for the mother-to-be and will treasured keepsakes for years to come. They are great for baby bedding, coordinating crib bedding in the baby nursery, on the floor or playpen, or for the Mother on the go in the car or stroller.
The Author:
Sharon Camp, The “BabyQuiltLady,” has been quilting for over 40 years. Visit my website: www.uniquebabyquiltboutique.com and chose of one unique handmade baby quilts from my collection for your baby’s birthday or other special event.
Thank you for using my articles in your online magazine. Quilting is my passion and I pleased to share it with others.
Sharon
The Baby Quilt Lady