With school in session, weekends become the best opportunity for quality time with your kids. Whether you’re taking your family to the park or spending a day around the house, you can easily fill the time by planning several simple, budget-friendly, do-it-yourself activities. Ideal for indoor or outdoor time, these activities go a long way in creating memories without doing a number on your budget.
Theme Day
The cost to take the family to a baseball game, amusement park or museum adds up quickly. Think thrifty and save on the admission fees by organizing a craft day around the theme of your favorite family outing (think aquarium, ballpark and carnival). For example, bringing the enjoyment of America’s favorite pastime to your living room or backyard is easy when you buy several plain cotton baseball caps, tube socks (they only cost a dollar or two each) and T-shirt paint. Use the materials to let your kids personalize baseball apparel and then suit-up, grab some peanuts and gather the group to play catch in the backyard, for an impromptu tournament on your favorite gaming system or to catch a double-header on the tube. It’s a ballpark outing for a fraction of the cost.
Have Your Candy and Craft with it Too.
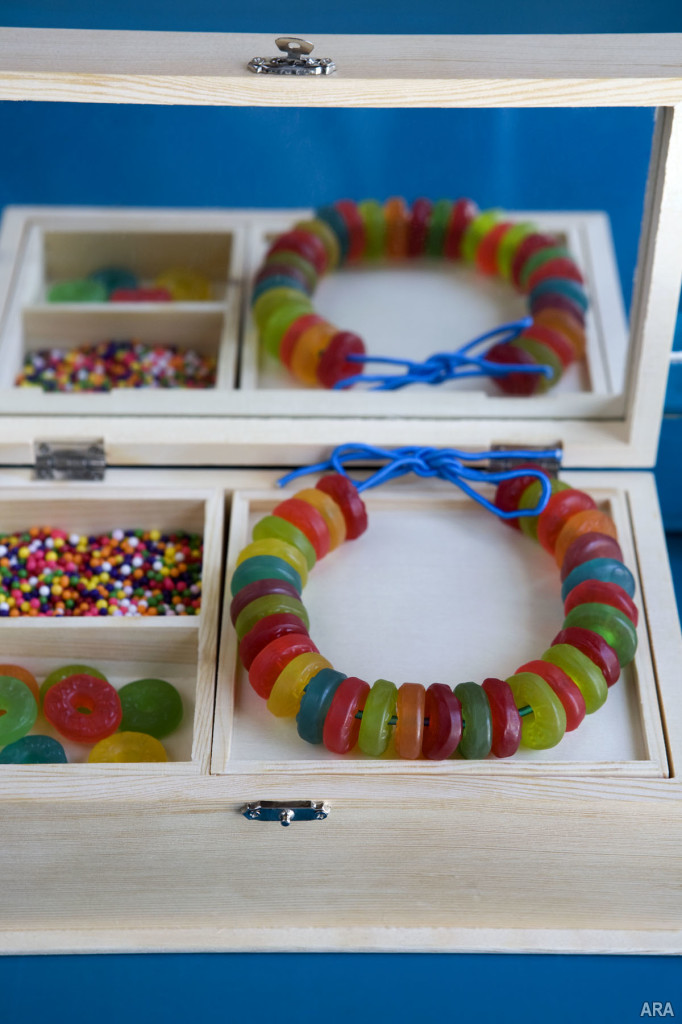
Most families make weekly (if not more frequent) trips to the grocery store, so turn your next routine trip into the beginning of a new project by strolling down the candy aisle. “The grocer’s candy aisle has a collection of candy in virtually every color and shape, which means endless crafting possibilities,” explains candy expert Beth Kimmerle. “Candy is tasty and fun for kids of all ages, and is an affordable tool for crafting.”
Start by making candy jewelry. It is a perfect activity for your princess, but also trendy for your prince given the popularity of sports necklaces and bracelets for boys and girls. Gather an assortment of brightly colored Life Savers Gummies, tie a knot in a piece of ribbon to keep your candy from slipping, and thread your “jewels” onto the necklace. Once you have a full string, adjust the candy so there are equal amounts of ribbon on each side. Tie knots on each end to finish and voila, you’ve got the trendiest kid on the block. While you are lending a hand, don’t forget that gummy candy is a yummy treat while crafting. Who knew jewelry could be so inexpensive and tasty?
Treasure Your Trash
Next time you start to throw away packaging, leftover candy or craft items, stop and envision these items as your next treasure and creatively think of ways to reuse them. Re-using the items helps you to be less wasteful, while also saving you money and giving you “gems” to finish your crafts with a unique touch.
If your kids love trucks, drum-up some fun on a weekend and help them create something fabulous on four wheels from common items found around the house. Try the following simple exercise and in no time you’ll be watching your kids proudly race their handmade creations across the kitchen floor or back porch.
To make a truck you will need:
- Egg carton
- Berry basket
- Craft paint and paintbrush
- Scissors or craft knife
- Twine
- Glue
- Cardboard
- Colored paper
- Gum foil
- 4 Hubba Bubba Sour Gummi Tape packages
- 5 Hubba Bubba Glop packages
- 2 Life Savers candies
- 4 Altoids mints
Instructions
Note: Cutting with sharp implements should only be done by adults.
Using an Exacto blade or sharp scissors, cut a 3-inch by 2-inch front window area from the berry box. Paint the egg carton orange to use as a truck body and paint the berry box white to use as a truck cab. While those parts are drying, paint your four empty Hubba Bubba Sour Gummi Tape packages black for truck wheels.
Cut a 6-inch by 4-inch piece of cardboard and glue the same size piece of orange craft paper to the top. Next, to make the truck’s load, stack the six empty Hubba Bubba Glop packages and glue them onto the orange board. Tie twine around the board as straps, tightly securing twine at the bottom of the board. Now, glue the finished load onto the back of the egg box.
Glue Life Savers candies for lights below the front window area of the white-painted berry box and glue the finished cab to the front of the egg box. When the wheels are dry, glue 2-inch silver circles with smaller red 1/8-inch foil circles on top of the painted Hubba Bubba Sour Gummi Tape packages and glue Altoids in the middle to finish the wheels.
Finally, glue the wheels evenly to the bottom of the egg carton truck. Let them dry completely and then go have fun.
The Author:
ARAcontent.net