Dyes, Coloring Wood For Dramatic Effects
Overview
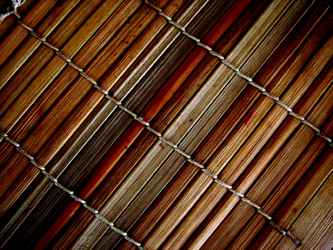
One of the more popular ways to enhance the visual look of a wood turning, is to change its color. By using various dyes and other coloring products, you can easily transform a bland piece of wood into something spectacular. Because the wood will accept the color less in side grain areas and more in end grain areas, delicate and subtle grain figure can be significantly enhanced.
Pale timbers can be made to look vibrant and glowing. Dark timbers can also benefit from coloring, adding warmer and richer undertones and highlights. If you’ve never never experimented with coloring wood before, don’t worry. It’s an easy technique to learn and the products are usually inexpensive, allowing you to freely experiment on various projects.
Types of Dyes
There are many different types of dye and coloring products available for wood. Two popular dye types are spirit (solvent) based dyes and water based dyes. Of the two, the spirit based dyes are easier to use if you’re just getting started, as they are virtually goof-proof within the modern dynamic of a wood turning environment. Spirit based dyes dry very quickly and most are fully inter-mixable, allowing you to achieve almost any color from a few base colors. In addition, most spirit based dyes are light-fast, which means that the color is resistant to discoloring when exposed to light.
Water based dyes can also be used to color wood, but they are not as easy to use as their spirit based counterparts. Water based dyes take much longer to dry and also raise the wood grain, requiring an additional step to remove the raised grain prior to finishing. In addition, some water based dyes are not light-fast, which means that they may discolor when exposed to light.
Dye Application Quick-Tips
# Spirit based dyes can be applied by numerous methods including brush, rag, paper towel or dip bath. For finer detail and control of the color application, an artists airbrush, H.V.L.P. sprayer, or a small disposable sprayer can be used. If you wish to layer (a gradual blending of one color into another) multiple colors onto a project, a simple artists airbrush can be used. These can be obtained inexpensively at most major craft stores.
# Dyes will accentuate any residual sanding scratches, or bruised grain areas on the surface of your project! Therefore, always insure the surface contains no defects and sand to a minimum of 600-grit (1,200 grit or higher for gallery quality work) before applying the dye onto the surface of the wood.
# To limit the color to a specific area such as the rim of a platter, turn and sand the area that you wish to color. Leave the rest of the project rough turned. When you have finished applying the color to the desired area and it has fully dried, finish turn the rest of the project. Then, using your gouge cut into the colored area to remove any unwanted color and clean up the edge boundaries. This will create a knife-edge between the colored and uncolored areas on the project, creating a crisp visual transition.
# To color the entire project with a single color, or several colors, turn and sand the entire project before applying your chosen colors. It’s very easy to mix the colors right on the surface of your project, creating additional colors in areas where different colors blend together.
# If you prefer a very light blush of color on your project, simply add a small amount of your chosen color to a thin lacquer, or alcohol based finish and mix thoroughly. This will create what’s called a tone-spray effect. This produces a very translucent color that is almost imperceptible, enhancing the piece in a provocative, yet subtle way. This effect can only be achieved when the thinned color is sprayed onto the surface. By spraying, you can easily control the depth and intensity of each layer, while maintaining smooth transitions between individual colors.
# Most spirit colors are too intense to use straight out of the bottle. You can easily thin the color by decanting some of the concentrate into a metal can and adding the appropriate solvent. I like to thin most spirit colors 50/50, (solvent to color concentrate by volume) before using them. This creates a light wash color, which is very easy to control as you are building your color on the surface.
# When using dye concentrates, only decant enough to complete the project you will be working on. This keeps your original color fresh in the container and ready for your next use. To prevent cross-contamination or dilution of the original color, never return used concentrate or thinned dye to the original container
Coloring your work is a simple way to begin your exploration into decorative embellishments for your wood turnings. These and other creative explorations, focus your inner muse in new and exciting ways as you continue to develop your own unique artistic style.
The Author:
Steven Russell is a professional artist, demonstrator and writer.