Guide to Making Homemade Garlic Powder
Garlic powder is a versatile seasoning that can add flavor and depth to any dish. While it’s easy to buy garlic powder at your local grocery store, making your own can be a fun and rewarding experience. Not only will you have a fresh and fragrant spice to use in your cooking, but you’ll also save money and avoid artificial preservatives. In this article, we’ll walk you through the steps of making garlic powder at home, from selecting the right cloves to storing the finished product.
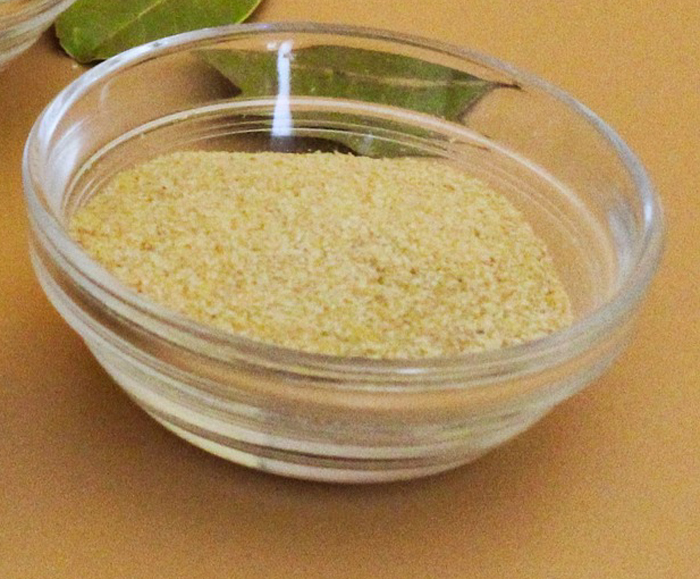
Homemade Garlic Powder
Ingredients:
- Fresh garlic bulbs
- Baking sheet
- Oven
- Spice grinder or mortar and pestle
- Airtight container
Step 1: Choose the Right Garlic
The first step in making garlic powder is choosing the right garlic. Look for fresh, firm bulbs that are free of mold or soft spots. Hard-necked garlic varieties are generally considered to have a stronger flavor, so keep that in mind when selecting your garlic.
Step 2: Peel the Garlic
Next, peel the garlic cloves by separating them from the bulb and removing the papery skin. You can do this by hand or with a garlic peeler, which is a handy tool that makes the process easier.
Step 3: Dry the Garlic
Once you’ve peeled the garlic, you need to dry it before you can turn it into powder. There are two methods you can use: air-drying or oven-drying.
Air-Drying: Air-drying is the simplest method, but it takes longer. Simply spread the garlic cloves out on a baking sheet and leave them in a warm, dry place with good air circulation. It can take up to several weeks for the garlic to dry completely.
Oven-Drying: If you’re short on time, you can use your oven to dry the garlic. Preheat your oven to its lowest setting (around 140-150°F) and place the garlic cloves on a baking sheet. Put the baking sheet in the oven and leave the door slightly ajar to allow the moisture to escape. Check the garlic every hour or so until it’s completely dry and crumbly.
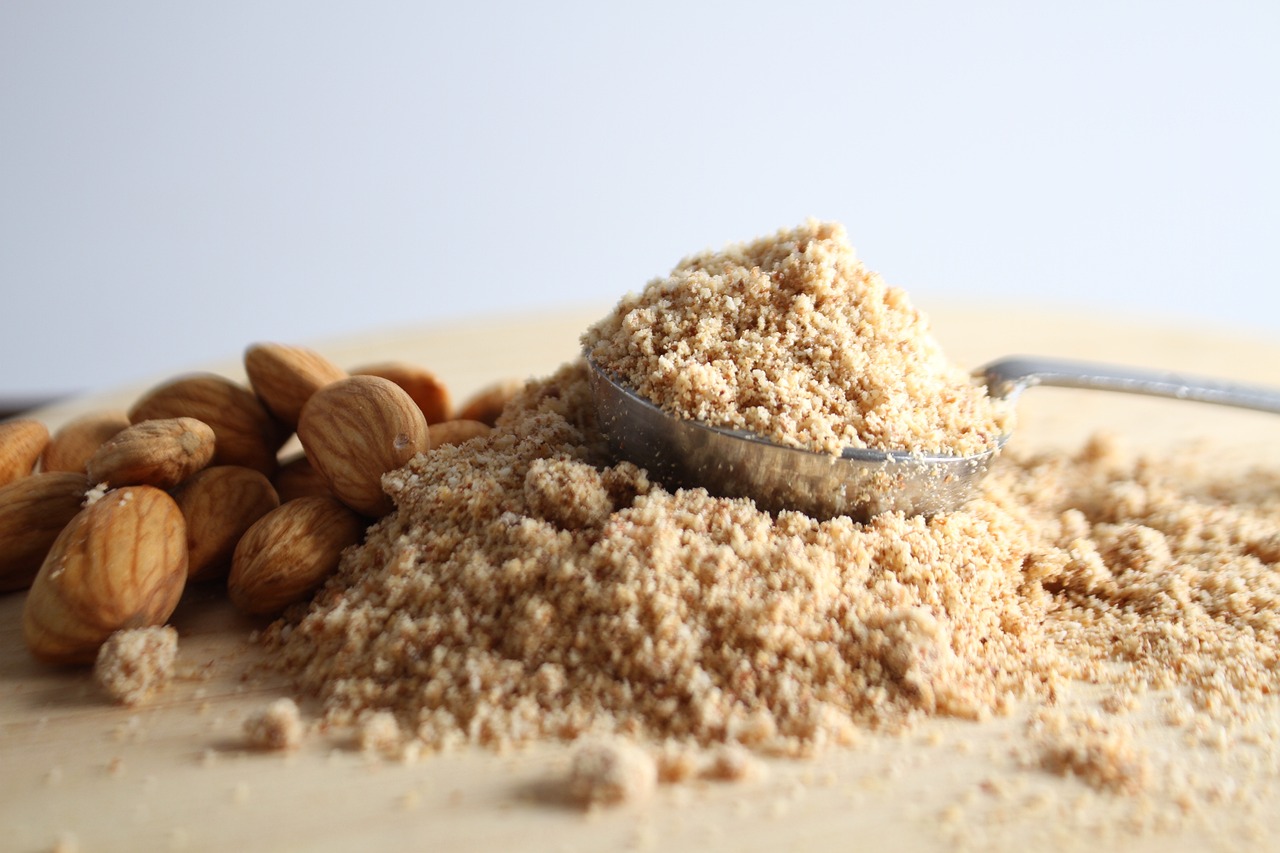
Step 4: Grind the Garlic
Once your garlic is dry, it’s time to turn it into powder. You can use a spice grinder, coffee grinder, or mortar and pestle, depending on what you have available. For best results, grind the garlic in small batches to ensure that it’s evenly powdered.
Step 5: Store the Garlic Powder
Finally, store your homemade garlic powder in an airtight container in a cool, dark, and dry place. This will help preserve its flavor and aroma. It’s also a good idea to label the container with the date you made the powder, so you can keep track of how fresh it is.
In conclusion, making garlic powder at home is a simple and rewarding process that adds an extra element of freshness and flavor to your cooking. By following these easy steps, you’ll have a flavorful and fragrant spice that’s perfect for seasoning your favorite dishes.
Shelf Life for Homemade Garlic Powder
The shelf life of homemade garlic powder can vary depending on storage conditions, the quality of the garlic used, and whether any additives or preservatives were added during preparation. Generally, if stored in an airtight container in a cool, dry place, homemade garlic powder can last for up to one year. It’s important to keep an eye out for any signs of spoilage such as discoloration, mold, or an off smell, and discard the powder if any of these occur.
Here’s a simple recipe for garlic salt:
Garlic Salt
Ingredients:
- 1/2 cup kosher salt
- 2 tablespoons garlic powder
Directions:
1. In a small bowl, mix together the kosher salt and garlic powder until well combined.
2. Spread the mixture out on a baking sheet lined with parchment paper.
3. Let it dry for a few hours or overnight. You can also speed up the process by placing it in a preheated oven at 200°F for about 20 minutes.
4. Once completely dry, use a food processor or mortar and pestle to blend the mixture into a fine powder.
5. Store in an airtight container.
Your homemade garlic salt is now ready to use! It makes a great seasoning for all sorts of dishes, from roasted vegetables to grilled meats to popcorn. Enjoy!
>>How to Make Wild Garlic Salt: A Simple and Delicious Recipe
The Author:
Pioneerthinking.com – Ingredients for a Simple Life.
Photo. Biggi Be
