How to Plant and Grow Snap Peas
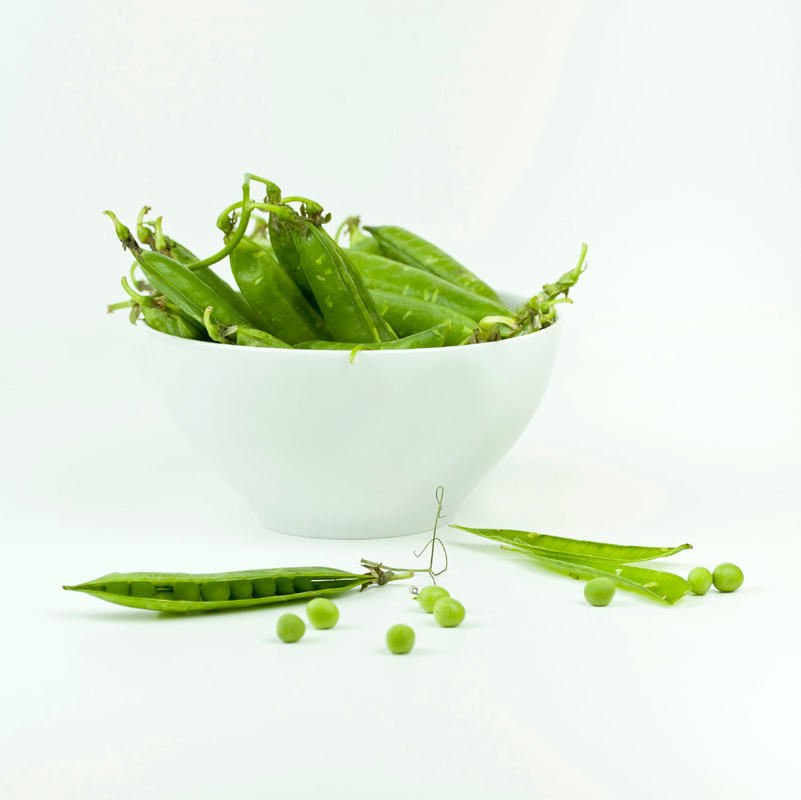
Snap peas are also known as sugar snap peas. They differ from snow peas by the fact their pods are more rounded in shape and contain slightly more mature peas. Snap peas are a cross between snow peas and garden peas. The whole pod is eaten and has a crunchy texture and very sweet flavor.
Snap peas are a very rich source of Vitamin C whereby just 100g contains 100% of the recommended daily intake. Furthermore, the vegetable provides a good source of dietary fiber (10% recommended intake), folic acid (10% recommended intake), Vitamin A (22% recommended intake) as well as being a good source of iron, calcium and Vitamin K.
Sowing snaps peas is an easy and rewarding experience, not to mention the luxury of having your very own fresh produce available in your very own backyard. Below is a step by step guide for sowing your snap peas:
Step 1: Soil Preparation
Snap peas can be grown from a wide range of soil types ranging from heavy to light soils, although needs good drainage and a friable well-structured soil. The vegetable prefers a pH range of 6.0 to 7.0 and lime should be added if soils are too acidic. Turn over your soil to aerate it, add some fertilizer, I recommend using horse manure and a slight amount of blood and bone meal.
Step 2: Planting the Seeds
Snap peas have a very delicate root system, therefore it is recommended to direct plant your seeds into the garden as opposed to growing seedlings in trays. Sow at a time to avoid flowering during the frost periods. Prepare flat trenches approximately 15cm (6″) wide and 5cm (2″) deep. Plant seeds at an interval of 7.5cm (3″) and when sowing multiple rows allow 90cm (3.5″) between each row. Cover seeds with soil and firm down gently.
Step 3: Water Well
Once sown, water well and keep well watered throughout growing. Since peas are part of the legume family of vegetables they are capable of fixing nitrogen from the air and as such require little fertilizer. Snap peas will need to be trained to go up a trellis or similar support (stay tuned for how to construct your own garden trellis).
Pests:
Birds can be a problem for emerging seedlings. If required, cover rows with bird netting until seedlings are 10cm high. Pests and diseases are minimal, although the most likely to damage pea crops are onion thrips which cause spotting of the pods. Caterpillars may also attack leaves and pods. Mildew and rot is also a common problem, whereby the seedlings are stunted and the vines are an off color. Typically mildew and rot is caused by poor drainage in the soil.
Harvesting:
Snap peas are usually harvested 8-12 weeks after planting and may continue for 8-10 weeks. Typically snap peas are harvested when the pod is still flat and the seeds are just starting to swell. Be sure not to leave the pod on the vine too long well before any etching of the veins show on the surface as it may become stringy.
Storage:
You’ll get the best flavor if you eat the peas right away (typically same day as harvesting). Although peas can be kept in the pod in the refrigerator crisper for up to a week (be sure not to wash until ready to eat). Alternatively you can wash thoroughly, remove stems and leave peas whole, blanch for 90 seconds then chill quickly and freeze immediately in an airtight container for up to 12 months.
Enjoy!
The Author:
James Draper comes with years of experience in growing and maintaining his own backyard garden.