Tips for Making Wood Beads from Twigs
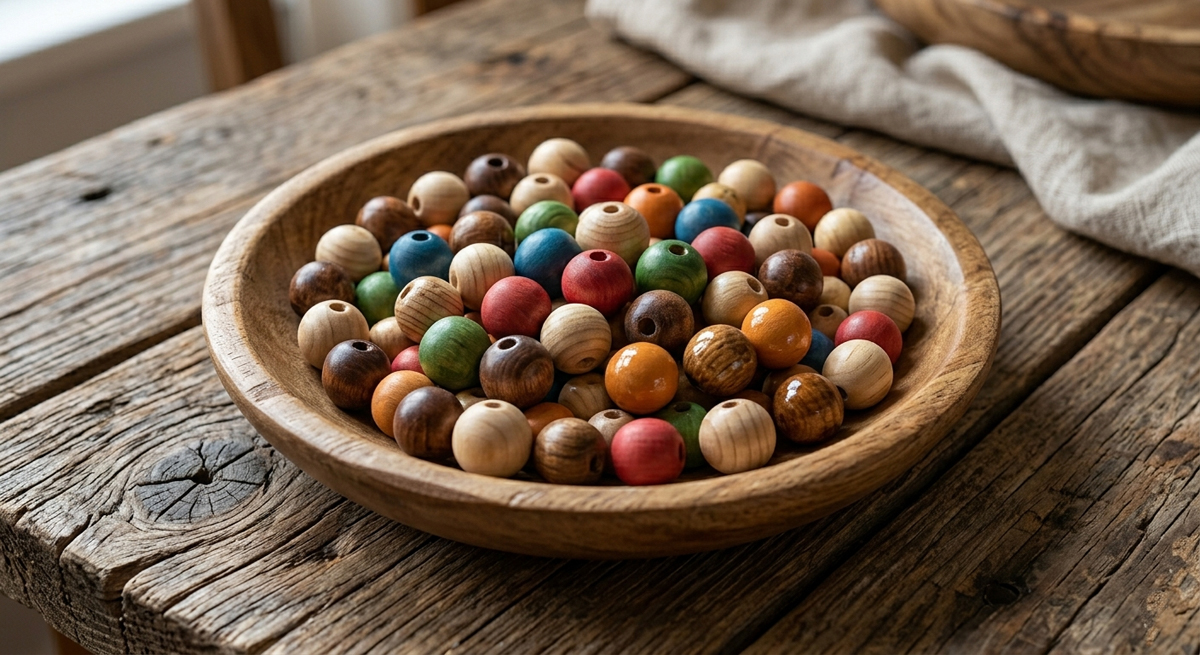
If you like to make crafts that call for decorations with wooden beads then you might be interested in learning how to make wood beads using twigs that you already have in your yard. You can make your wood beads the size you want them to be, and color them using stains, paints, and varnishes; so that they are the color you want them to be.
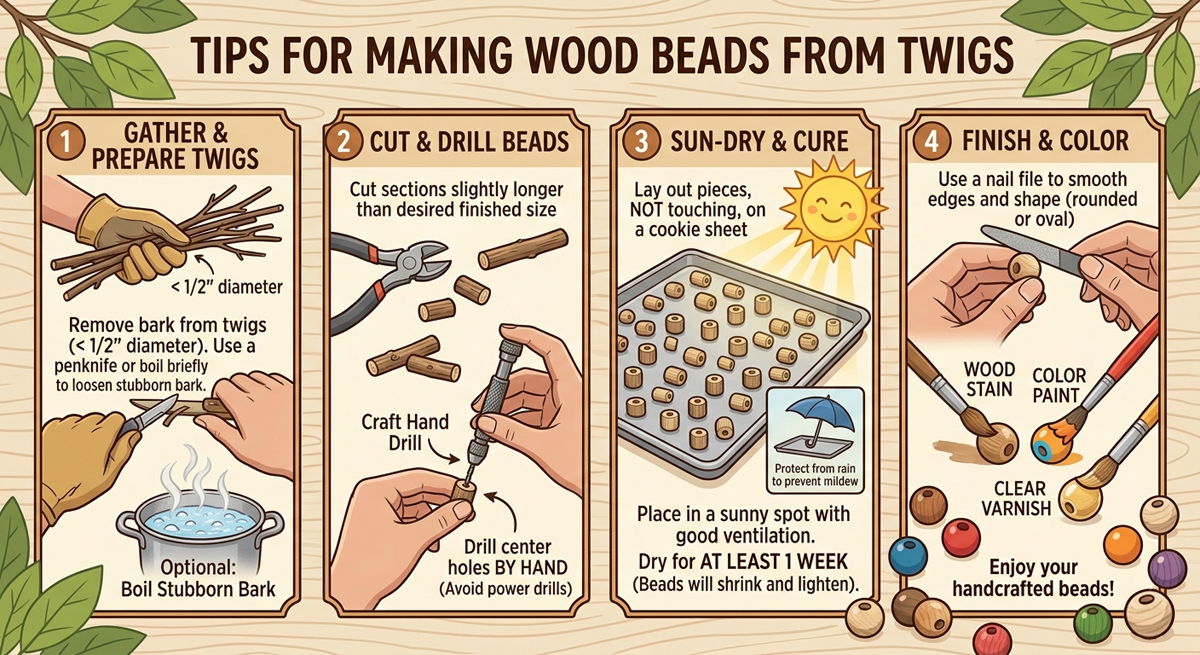
To make wood beads from twigs you will need to gather some twigs that have a diameter of less than one half an inch in diameter. You will need to remove all of the bark from these twigs. You can do this on some types of wood easily, and on some stubborn twigs you may have to use a pen knife to scrape the bark away, or you may need to boil the twigs for a few minutes to make the bark turn loose.
You will need to cut the de-barked twigs up into sections that are slightly longer than you want your finished wood beads to be. Once you have the twigs cut up you will need to use your craft drill to create the center holes in them. You want to drill these holes by hand instead of using a power drill, because the power drill will simply go too fast through the pulpy portion of the twig and will leave you with wood beads that are either unattractive, or with some that are broken.
Once you have your twigs cut to length, and have holes drilled in the center of them, you should lay them out on a cookie sheet. Make sure that the pieces are not touching each other. Place the cookie sheet of fresh wood beads in a sunny place in your yard. You want the area to get good ventilation, and plenty of daily sunshine.
Your wood beads will need to sit in the sun drying for at least one week. You cut them slightly larger than you actually wanted them to be because the sun is going to cause the twigs to shrink some as they dry. When the beads are totally dry they will be lighter, and smaller, than they were when you first laid them out on the cookie sheet to dry.
If it rains during the time that your beads are going through their drying process you will need to get the cookie sheet and place it in a sheltered area until the rain is over. If you do not do this then the bead will get wet, and could possibly mildew because of the moisture.
Once your beads are dry you will be able to use a nail file to remove any sharp edges. You can even use a nail file to help you shape the wood beads into shapes that are more oval or more rounded.
After you have smoothed the pieces using a file you will be ready to varnish, or paint, the items. It will be tempting to do several of them at one time, but the individual pieces will look better if you do them separately.
Wood beads can be made at home from nothing more than small twigs that are less than one half inch in diameter. Wood beads can be painted, stained, varnished, or left in their natural state.
The Author:
You can get more information from wood beads wholesale and panda hall beads. http://www.pandahall.com/wood-beads/197-1.html
Photo. Gemini
Source: EA

