Distressed Antiqued Paint Techniques
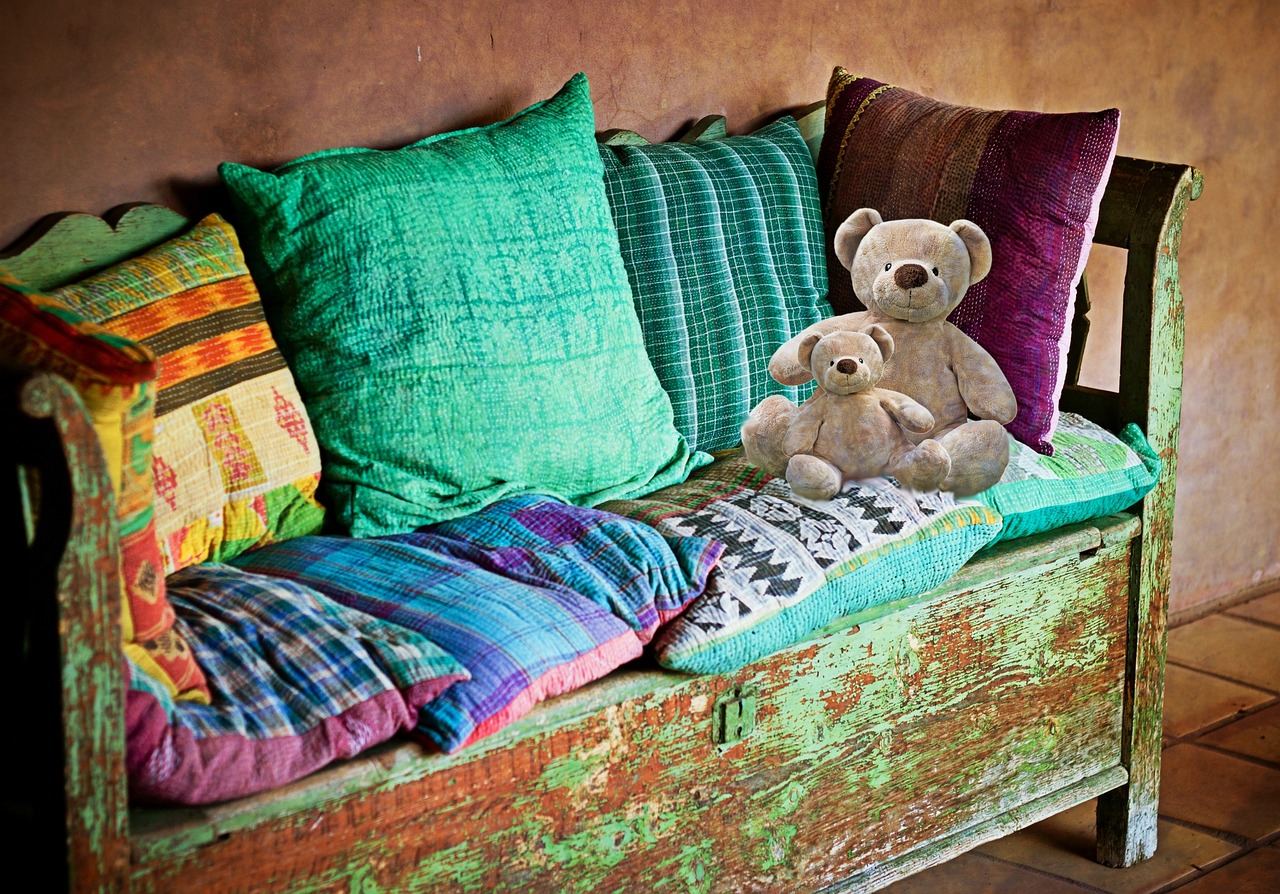
The draw of a distressed finish is that it will have more personality and charm than its perfect counterparts. Every nick, scratch, and faded hue is a story of ages, a badge of honor earned by the furnishing in service to the home. However, while the natural process of fade and wear may take many years, there is actually a paint technique which you can employ to achieve it almost instantly, imbuing even the freshest unfinished wooden piece with a sense of aged reverence.
If you are working with a new unfinished surface, you may want to practice on a spare piece of wood before you begin in earnest. This technique is a form of art, and the barest nuances can dramatically alter the final effect. Play around with scoring, texturing, and different levels of painted layers so you can get a good idea of how different effects end up looking.
The first step is to texture the surface of the piece gently, using a nail, screw, or wire mesh. You want the markings to be random and dispersed. Try to imagine how each mark would have actually occurred, a scuff mark, a misplaced kick, nails across a surface. By following the logical path of use you will most closely follow reality in its marking.
Once you have marked the wood sufficiently, take some clear latex interior wood stain and squirt a single burst of burnt umber universal tint into it to give it a soft, washed out color. Apply this evenly to the entire surface of the piece. This will both make the wood look aged, and will also prepare the surface by sealing it.
The first color layer you apply should be dark, with eight parts of black paint mixed with one part water to create a vaguely washed out midnight hue. This should be applied very lightly to the surface of the piece, with only the very bristles of the brush slightly damp as you trace it up and down the wood. Don’t worry if you miss a few spots as they will be filled in by later colors. Allow the piece to dry thoroughly.
Next two separate containers. In one mix Lafayette green paint, and latex glaze in even parts. In the other mix Covington blue, glaze, and water, all in equal parts. These should then be applied one at a time, lightly, and somewhat sporadically. This will mimic the “original paint” of the piece which should look faded and hazy.
Both of these layers should be allowed to thoroughly dry as well. Then take a piece of sandpaper and lightly score the wood, tracing along edges and in corners, to create a sense of wearing away at the paint from years of use. Pay special attention to anywhere that has moving parts, or that might have suffered from more abuse than other components of the whole.
The last step is to take a wire brush and rub it vigorously over the entire thing. This will create thousands of tiny scratches in the surface of the paint, making it look cracked and worn away. This can be done to your taste, to create a glowing shimmering sheen across the entire piece.
The Author:
This article is provided courtesy of PebbleArt, a wholesale and retail supplier of rustic natural stone accessories and home furnishings, crafted from a variety of marble, slate, and onyx materials. The article itself was written by Joey Pebble, an artist and design professional.


