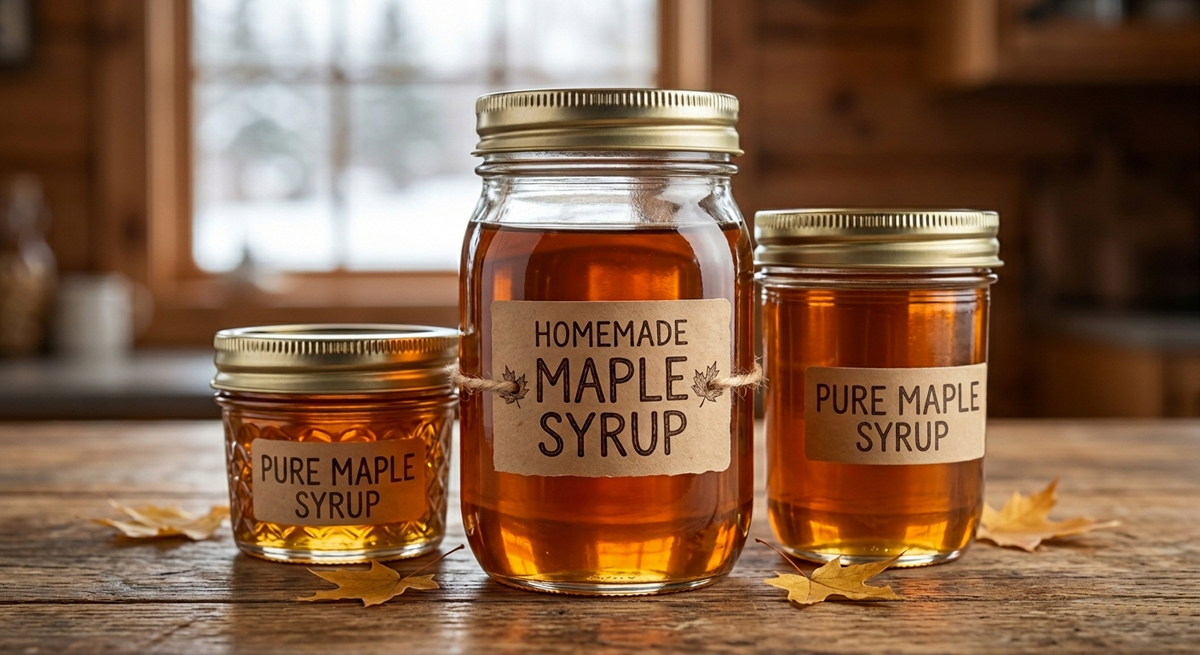
How to Make Your Own Pure Maple Syrup
For lots of people, there’s simply no comparison between using genuine maple syrup and the imitation alternatives. Real maple syrup has an incomparable taste that’s unrivaled when used as a topping or for cooking. The price of authentic maple syrup can make it hard for individuals to consume this condiment 100 percent of the time. One option can be to produce your own maple syrup! While it may seem like only experts could possibly do it correctly, there are straightforward, time-tested processes that can help you make your own bottle!
Before you can start to make syrup, you first need to make sure you have access to sugar maple trees. Additionally, you will require some tools will be used in the collection phase. These include a drill, ideally with a 7/16-inch bit, a spout, found at a maple equipment store or on the internet, and a collection container, preferably one that will not rust.
To begin the collection phase, pick a tree during the identified collection months in the spring. It is ideal to find a tree that’s approximately 10″ in diameter. At a height that will make the spout readily accessible, drill a hole a few inches into the tree trunk. Drive the spout into the hole so that it is firm and secure in the tree. The container should be able to hang from the spout and collect the sap. Once you have gathered enough sap, you should store it in a refrigerator or take it immediately to the next phase in the process which is boiling.
The boiling process necessitates special attention if you want to end up with pure maple syrup. As was the case in the first step, various tools, including a large pan or pot, are needed in order to be successful in this phase. Stainless steel, a cooking site, is the most preferred option. Knowledgeable syrup makers recommend the use of open wood fires and a temperature gauge to determine the temperature of the sap.
Boiling the sap will take time and attention! Once you bring the sap to an initial boil, it’s critical to take the temperature promptly. This temperature will tell you how much longer you will need to boil the sap. Experts agree that the syrup is getting close to a finished quality when it’s 7 degrees warmer than the first reading. Depending on the form of fire you’re using, this process may take several hours, and must be monitored.
When you are certain that your syrup has been reduced to the proper ratio, there are a few final steps before it’s ready to taste! The syrup needs to be strained by some method to reduce or eliminate some of the natural grittiness present. Filtering can be done utilizing a special syrup filter or a simple piece of cheesecloth. If you want to eliminate 100% of the sediment, you may want to repeat this filtering process multiple times.
Finally, it is advisable to put your homemade pure maple syrup into glass containers. The finished syrup can either be stored at room temperature or refrigerated. Before savoring a taste, don’t forget to remove the spout from the tree, unless you are gathering more sap. You don’t need to plug the hole; maple trees close up on their own with time with no help!
>> read more: Organic Maple Syrup: 50 Uses From Ordinary to Extraordinary
Much like cooking a delicious meal from scratch, harvesting your own maple syrup is a rewarding process that ends with a delicious bottle you are very proud of. With the proper tools and a bit of time, making your own syrup is definitely an opportunity not to be missed!
The Author:
Make breakfast the best meal of the day with Sugar Shack’s pure maple syrup. We take pride in producing high-quality, handcrafted syrup that captures the true essence of the season in every drop.
Photo. Gemini
Source. AB
