Sowing Seeds and Transplant Seedling of Vegetables
After your nursery have been constructed and everything is in place be ready with the other activities to follow. You should gather the materials in preparation for the sowing of the seeds.
Sowing of Seeds
Prior to seed sowing, have your tools and materials prepared.
The following materials should be at hand:
- rice hull charcoal
- coco coir dust
- chicken dung (soil media/growell medium)
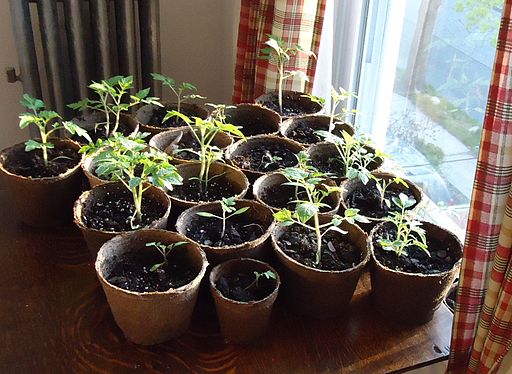
- growing/germinating trays
- shovel
- hand gloves
- measuring cans
- seeds.
If your soil media mentioned above are not available you can use the old soil media mixtures with a ratio of 1:1:1 ( e. g. garden soil, animal manures and sand).
The garden soil and animal manures should be properly sterilized before mixing together.
The quality of your seeds is the determining factors for the success of your business.
Select the best quality seeds to be sure you can get the most profit you want to achieve.
Characteristics of Good Quality Seeds
1) Damage free. Seeds should be free from any physical or chemical damage that will affect its viability.
2) Free from mixture with other varieties. Seeds must be totally pure and no other seed mixture.
To avoid mixture with other varieties the isolation distance when producing seeds should be at least 45-360 meters for pepper, 400-900 meters for eggplant and 30-60 meters for tomato.
3) Free from seed borne diseases. Seeds coming from parents affected with the diseases will be carried down to its offspring and affects the whole population thereby reduces its yield. Select disease-free seeds for a maximum return on investment.
4) Good vigor and germinating capacity. Select seeds that are viable, high germination percentage (at least 85% germination) and healthy.
To be sure buy the seeds you desire only in reputable seed producers and certified stores.
Factors in Germination of Seeds
- Viability. Look into the expiry date, brand and storage. Store seeds in sealed glass container with desiccants like; fresh wood ash (absorbs moisture), charcoal (prevents pests attack), and naphthalene balls.
Place your stored seeds in cool dry place especially in an ordinary room temperature.
- Soil medium. Germination of a vigorous seeds will depend on the kinds of growing medium you’ll use.
This is critical since the seedlings solely depend their food to nourish from the mixture you’ve prepared.
Recommended Growing Medium
1) rice hull charcoal (60%)
2) coco coir dust (30%)
3) chicken dung (10%)
Coco coir dust and chicken dung must be sterilized property to kill some harmful bacteria, fungus and virus that may affect your seedlings.
You can still follow the old soil medium preparation in the absence of the above ingredients such as; one part sand, one part compost, and one part garden soil.
But just the same, you have to sterilize all the medium to avoid the above diseases occurrence.
Sterilization can be done by heating all the above soil medium above the fire heating for around 30 minutes to one hour, or exposing to direct sunlight for at least one day.
- Sowing Technique. Seed germination can be carried out
by following these methods; sun drying, soaking in top or lukewarm water, scarification, this will be discussed later.
- Temperature. Different seeds varies in their temperature requirements.
Temperature requirements of different vegetable seeds…
1) Cucurbits – 30 – 35 °C for 3 -7 days
2) Solanaceous – 20 -30 °C for 5 -10 days
3) Brassicas/Crucifers – 15 -20 °C for 3-4 days
Seeding Rate Computation
Computing for seeding rate will be based on the standard plot size (1 x 20 linear meters). To give you the right number of seeds to be planted in a single 1 x 20 linear meter plot size, below are example how to compute the right amount of seeds:
Formula:
Plant pop’n. = length of plot X (No. of rows x No. of plots)
Planting Distance
Example: Eggplant
Given: Plan size – 1 x 20 linear m.
Planting distance – 60 – 70 cm
No. of rows – 2
No. of plots – 14 plots
Mortality rate – 30%
Seedling capacity – 104 holes
Computation:
- Plant Pop’n. = 20 m x (2 x 14)
70 cm/.7 m
= 28.57 x ( 2 x14)
= 800 x .3
= 240 + 800
= 1,040 seeds
= 1,040
104 seedling/germinating tray cap.
= 10 Seedling trays needed
Based on the computation following the formula, we came up with the number of seeds needed for a single twenty-meter plot size.
At a distance of 60-70 cm (70 cm was used) and two rows per plot.
We assumed a 30% mortality rate and the seedling/germinating tray to be used has a 104 holes capacity.
We need fifty seven seeds per plot multiplied by fourteen plots, therefore we need 1,040 seeds and ten seedling/germinating trays are required to germinate the seeds.
Different crops varies in their planting distance, so you can compute the number of seeds based on the distance requirements.
The wider the distance of planting the lesser is the number of seeds needed.
Sowing Techniques
The germination percentage of vegetable seeds depends on how they are handled before placing on the germinating trays. This includes the quality of growell medium to be used.
Before the seeds are sown to the germinating trays some activities should be made:
- Soaking. Usually the seeds are soaked in water for thirty minutes to one hour before sowing (Ampalaya, Upo, Patola, Squash, Cucumber, Honeydew, Muskmelon and Waterrmelon).
- Cutting. Using a nail cutter the tip of the seeds near the embryo is cut after soaking and sow to the germinating tray at one seed per hole (Ampalaya, Upo and Patola).
- Pinching. This process is applicable only for squash.
After soaking the seeds for 30 minutes to one hour, pinch the tip near the embryo and sow to the seedling tray at one seed per hole.
Be careful not to pinch the seed too hard. Pinch the seed lightly just to open the end portion. Pinching enhances the easy coming out of the plumule.
- Incubation. For Watermelon only (seeded and seedless).
After soaking for thirty minutes to one hour, incubate the seeds with the use of a moist cotton cloth and place in an improvised cartoon for 24-36 hours then sow at one seed per hole in the tray (seeded Watermelon).
For the seedless variety the same procedure is applied but the tip near the embryo is cracked before sowing.
- Direct sowing/seeding. Directly sow the seeds to the germinating tray at two seeds per hole (Pepper, Tomato and Eggplant) and two to three seeds per hole (Lettuce, Pechay, Cabbage, Chinese Cabbage, Broccoli and Cauliflower).
For Carrots and Radish directly sow the seeds to the field at two sees per hill. Carrots and radish are not sown in the germinating tray since their roots are damaged during transplanting and becomes abnormal or deformed – not good for market.
Bush/Pole Sitao, Asparagus, Snap Beans 1-2 seeds per hill.
How to Construct The Beds
After you’ve done with the nursery operations especially the germination of the seeds, follows the construction of plots or beds in preparation for the transplanting of the seedlings.
The ideal size of your plots should be 1 X 20 meters. But you can use 1 X 10 meters if your area is not wide enough. A shorter plot size is easy to manage and you can operate in a manner that it would be much easier to handle. It is understood that your field was already plowed and harrowed and ready for the construction of plots or beds.
With the use of a shovel and grub hoe make the plots following the desired exact measurement (1 x 20 m or 1 x 10 m plot size) depending on the size of your garden.
After you’ve constructed your plots, the next step is to cover them with a plastic mulch.
Plastic mulch is a new technology used in horticulture. It has the following Advantages.
Advantages of plastic mulch.
1) Controls weeds growth.
2) Retains soil moisture
3) Prevents soil erosion
4) Prevents soil leaching
5) Provides soil aeration
6) Insect repellant
7) Prevents or limit the possible virus attack or infection.
Steps in Plastic Mulch Installation
1) Excavate both ends portion of the plot with the use of a shovel or spade.
2) Lay the end portion of the plastic mulch and cover with the excavated soil.
3) Compact the soil by stepping it on to hold the plastic mulch in place.
4) Insert a straight pole inside the plastic mulch just enough that 2 person can hold at both ends.
5) With two people holding both end of the plastic mulch gradually lay on top to cover up to the plot end.
6) Reserve one meter allowance before reaching the plot end.
7) Stretch the plastic mulch to reach the plot end extending up to the excavated portion.
8) Cover with the excavated soil similar to the other plot end.
9) Cut the plastic mulch at the end of the covered portion.
10) Fasten both sides of the plastic mulch with a 6 inches tie wire or bamboo slots at two feet distance between fastener.
11) Fasten in a diagonal position covering up to the plot end.
12) Make holes on the plastic mulch in a triangle fashion using an empty sharp-edge big sardines can or tin can with heated charcoal. A string is also laid to make the holes straight.
13) The distance of the holes will vary according to the desired distant of planting for specific crop.
Transplanting and Planting Distance
Below are the different transplanting age and planting distance of vegetables.
Table 1. Transplanting Age and Distance.
CROP
TRANSPLANTING AGE
PLANTING DISTANCE/HILL
Watermelon
- Seeded
- Seedless
Honeydew melon
Muskmelon
Cucumber
Squash
Patola
Upo
Ampalaya
Sweet Pepper
Eggplant
Tomato
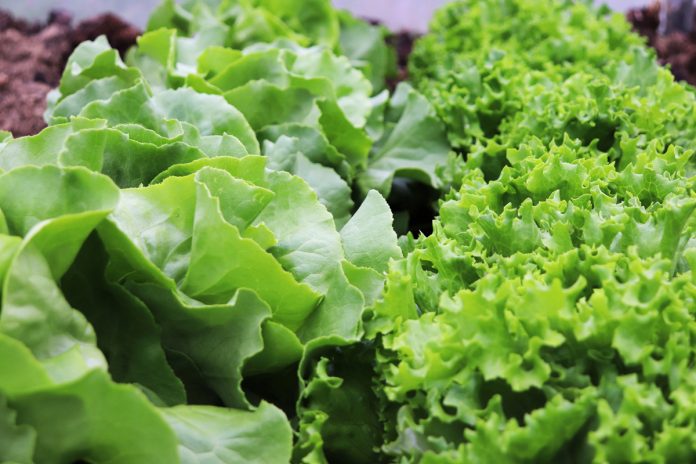
Pechay
Lettuce
Chinese Cabbage
Cabbage
Broccoli
Cauliflower
Carrots
Radish
Upland Kangkong
Bush Beans
Pole Beans
Baguio Beans
Chicharo
Okra
10-15 DAS
12-17 DAS
7-12 DAS
7-12 DAS
7-12 DAS
7-12 DAS
7-12 DAS
7-12 DAS
7-12 DAS
27-30 DAS
24-27 DAS
21-24 DAS
12-15 DAS
12-15 DAS
12-17 DAS
12-17 DAS
12-17 DAS
12-17 DAS
Direct Seeded
Direct Seeded
Direct Seeded
Direct Seeded
Direct Seeded
Direct Seeded
Direct Seeded
Direct Seeded
80-100 cm, 2 rows triangle
80-100 cm, 2 rows triangle
60-80 cm, 2 rows triangle w/ trellis
60-80 cm, 2 rows triangle w/ trellis
40-60 cm, 2 rows triangle w/ trellis
80-100 cm, 2 rows triangle
80-100 cm, 2 rows triangle
80-100 cm, 2 rows triangle
80-100 cm, 2 rows triangle
60-70 cm, 2 rows triangle
60-70 cm, 2 rows triangle
60-70 cm, 2 rows triangle
15-20 cm, 4 rows triangle
15-20 cm, 4 rows triangle
40-50 cm, 2 rows triangle
40-50 cm, 2 rows triangle
40-50 cm, 2 rows triangle
40-50 cm, 2 rows triangle
15-20 cm, 4 rows triangle
15-20 cm, 4 rows triangle
15-20 cm, 4 rows triangle
30-40 cm, 2 rows triangle
30-40 cm, 2 rows triangle
30-40 cm, 2 rows triangle
30-40 cm, 2 rows triangle
60-70 cm, 2 rows triangle
Methods of Transplanting
Seeds varies in its method of planting based on their ability to regenerate root development. Some are directly planted into the field while others are raised in the germinating trays.
Consider the following factors before planting:
- Cost and availability of seeds.
- Root regenerating ability of crop.
- Growth rate of seeds.
All legumes have no regenerating ability in their root system so they have to be planted directly into the field, while small seeds should be raised in the trays before they are transplanted.
There are some seeds that are fast growers [e.g. Upland Kangkong (water spinach).
Carrot and radish should be planted directly to the field to avoid root deformation.
Distance of Planting
1) Squash – 80 – 100 cm. between hills single row and triangular in fashion.
2) Upo, Patola, and Ampalaya – 80 – 100 cm between hill single row.
3) Honeydew, Melon, and Muskmelon – 60 – 80 cm between hills two rows.
4) Cucumber – 40 60 cm between hills two rows
5) Pepper, Tomato, Eggplant, Okra – 60 – 70 between hills two rows; 60 – 80 cm distance per plots
6) Cabbage, Chinese cabbage, Broccoli, Cauliflower – 40 50 cm between hills two rows
7) Lettuce (Head type) – 20 cm between hills three rows
8) Upland Kangkong (water spinach), Pechay & Lettuce (Leafy type) – 15 – 20 cm between hills four rows
9) Beans – 30 – 40 cm between hills two rows.
Techniques in Transplanting
1) Make holes on the plastic mulch film by the use of sharp-edge tin can or tin can with heated charcoal.
2) Irrigate the hole if the soil is dry for transplanting.
3) Dig the soil by the use of hole digger.
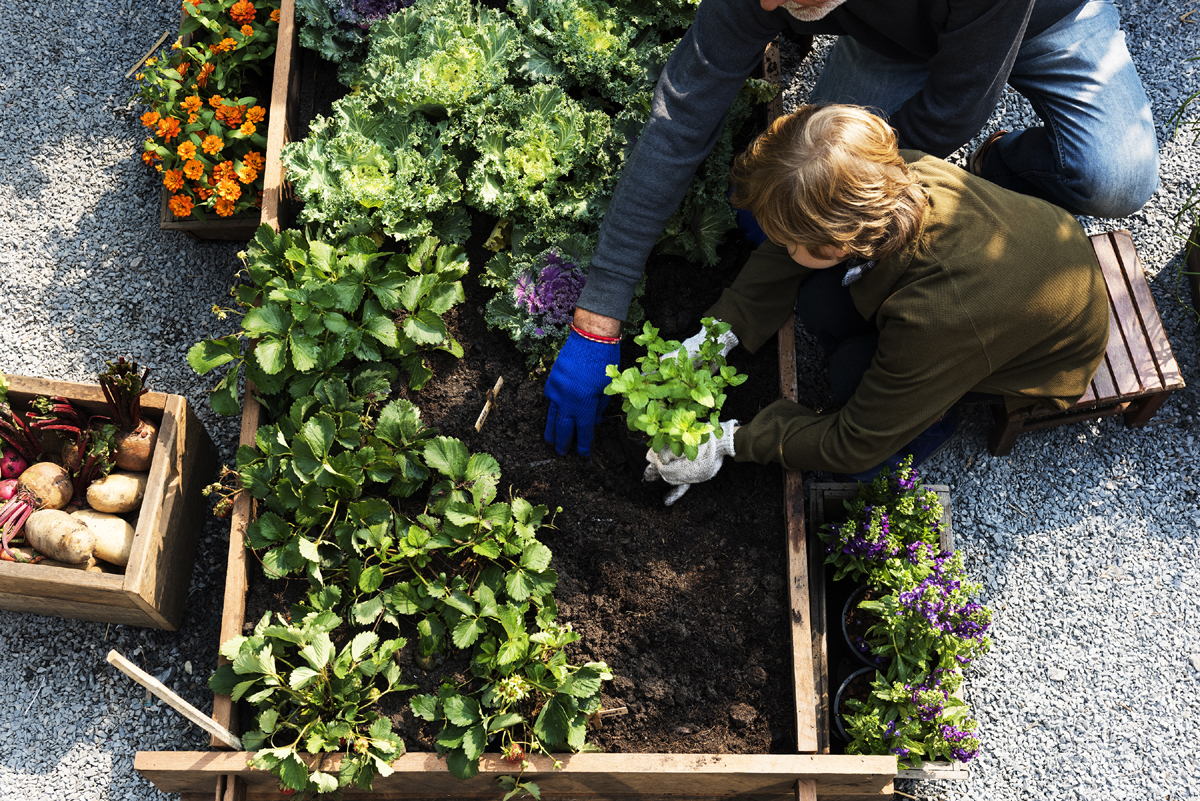
4) Transplant seedlings during cloudy and cool weather. During sunny days transplant in the afternoon.
5) Get the seedling carefully from the germinating tray by pressing the lower base to push the seedling upward, then transplant.
6) Irrigate seedlings frequently early in the morning and in the afternoon.
7) Monitor the seedlings regularly for missing hills and pests and disease occurrence. For missing hills, replant at once.
The Author:
Cris Ramasasa, Freelance writer, writes about home gardening and Internet marketing tips.
