Make a Stunning Dried Hydrangea Wreath
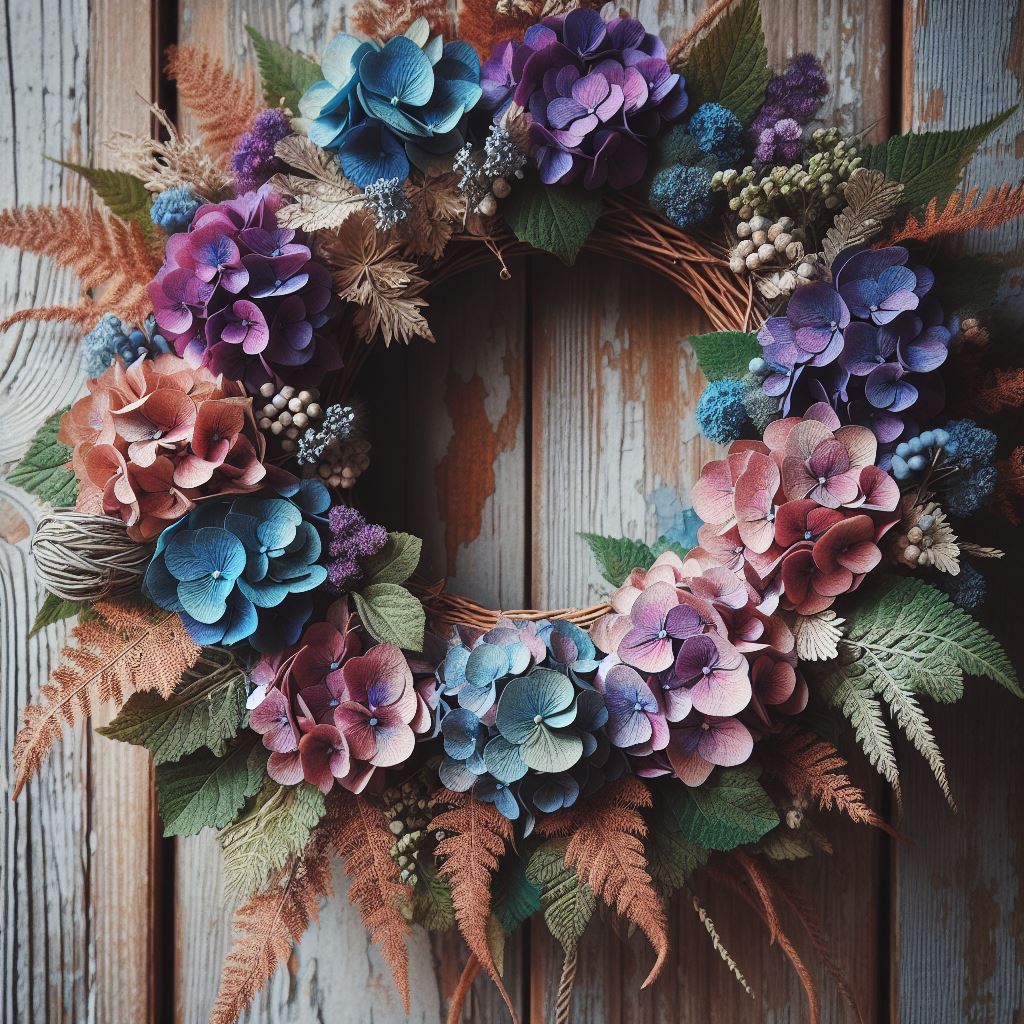
Dried hydrangea wreaths are so beautiful and versatile in a home, and a lot of fun to make as well.
You can either purchase already dried hydrangea flowers from your local craft store, or you can dry your own. The biggest trick when drying your own is the timing of when you pick the flowers. It is best to pick them right before you anticipate your first fall frost. If you pick them mid-summer, they just will not dry correctly.
You can either hang them upside down in a darkened room to dry, or you can set them in a vase upright, even adding a tiny bit of water in the bottom of the vase, although even that is optional. As long as they are picked at the correct time, it’s difficult to fail with them. It’s fun if you can, to pick several blooms from different bushes, as it will provide a nice variety of colors to the wreath. After they are dried, pick off any dead / discolored brown blooms.
Now, pick the type of base you want to use for a wreath. My personal favorites are either Styrofoam or grapevine type wreath bases. Take some floral wire and wrap it around the wreath, then form a loop of the wire to hang from the wall, and then wrap the wreath again. You might try hanging it from the wall at this point to make sure it lies correctly, and then make any needed adjustments while the wreath is bare.
To do a Styrofoam wreath, use a low melt point hot glue gun. Separate each bloom into smaller florets. Hot glue each floret into the wreath base, actually poking the stem down into the Styrofoam base. With each bloom, space it out over the surface of the wreath, for example; a floret at the top, next left side, bottom, then right side, then inside the circle of the wreath, and outside of the wreath. Continue to do this with each bloom until you fill it.
Balance is what you are looking for. Balance in shape, you don’t want any sticking out way above the others, you don’t want one side of the wreath to be fuller than the other. Try stepping back and looking at a distance and just think “balance of shape”.
The second area to look for is balance of color. This is the purpose of doing each bloom all over, then filling in, so you achieve that balance of color. Give another once over to check on that.
Now, this wreath is either finished, or you can add perhaps add small sprigs of dried baby’s breath to it. Really depends on the look you want. Sometimes the simplicity of only the hydrangeas is stunning.
For a grapevine wreath, it’s the same principal but a different look. You can tie a bow on the wreath if you want (if you do, do so before adding flowers), or ribbon. I like to leave bare spaces on these to be able to see the grapevine portion as well. Again, look for balance. You can also add dried roses to it or any other type of dried flowers or grasses too. You can get really creative with these and come up with very different looks. Experiment to your heart’s content.
Many times people expect dried floral arrangements to last forever, and are disappointed when they start looking bad after a few years. This is a misconception. Expect them to look good for about a year, that’s really about all they were meant to
last.
If they are in direct sunlight it will be a much shorter time. However, the next year, feel free to strip the old flowers off, and make another with the same base for another year’s worth of a gorgeous hand made wreath!
The Author:
Valerie Garner
Photo.
Source: Isnare.com
