Hand-Stamped “Apothecary” Garden Markers
As the soil begins to warm and the first green shoots of the season push through the earth, there is a quiet magic in the garden. This is the time for organization and intention. While plastic tags serve a purpose, there is something deeply satisfying about marking your heritage herbs and heirloom vegetables with materials that feel as timeless as the seeds themselves.
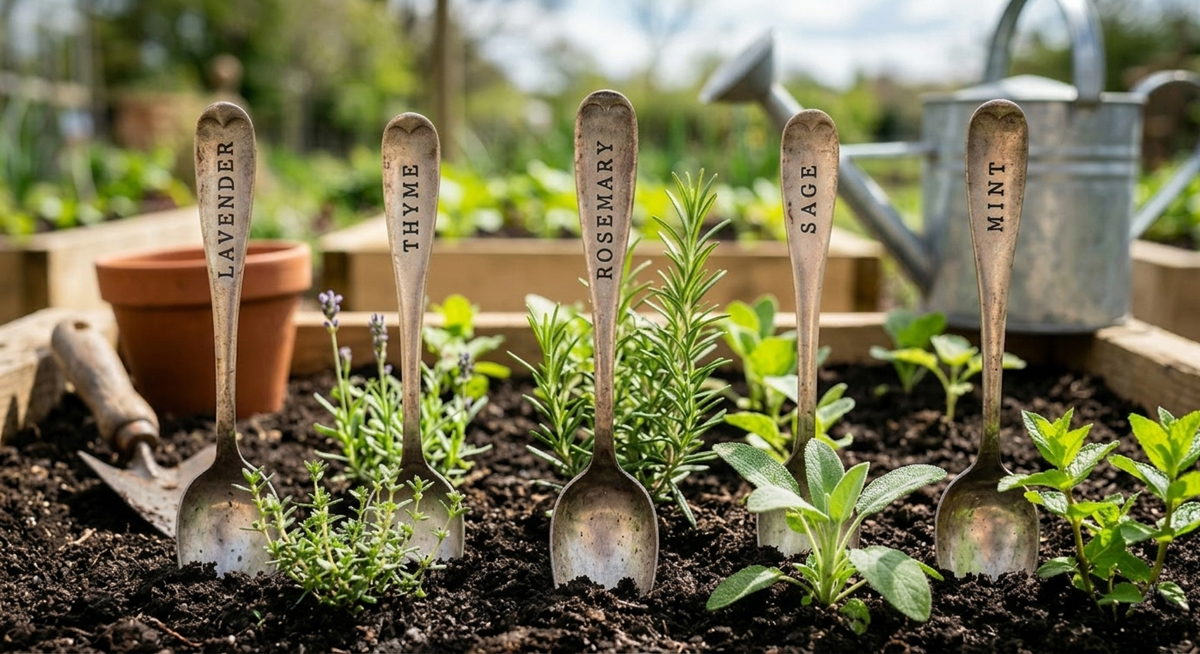
These hand-stamped “apothecary-style” markers repurpose vintage silverware into elegant, weather-resistant labels that develop a beautiful patina over time. They bring a touch of old-world charm to your raised beds and windowsills alike.
Hand-Stamped “Apothecary” Garden Markers
The Materials You’ll Need
To create a set of markers that will last for seasons to come, gather these simple tools:
- Vintage Silver-Plated Spoons: Look for these at thrift shops or estate sales. Silver-plate is softer and easier to stamp than stainless steel.
- Metal Stamping Kit: A basic 3mm or 4mm alphabet set is perfect for garden labels.
- Heavy Hammer or Jeweler’s Mallet: To provide the force needed for a clean impression.
- Steel Stamping Block: (Or a flat, sturdy piece of scrap steel) to provide a firm surface.
- Permanent Black Marker: To darken the letters for better readability.
- Fine Grit Sandpaper or a Polishing Cloth: To clean up the edges.
Directions:
1. Flatten the Spoon
Place your spoon on the steel block with the bowl facing down. Using your mallet, strike the back of the bowl firmly and evenly until it is flat. Don’t worry about perfection; the slight undulations in the metal add to the “found object” aesthetic.
2. Plan Your Layout
Before you strike the metal, decide if you want to stamp the name of the plant vertically or horizontally. For longer names like “ROSEMARY” or “ECHINACEA,” a vertical alignment down the handle or the center of the bowl often looks best.
3. Strike with Conviction
Place your metal stamp on the flattened bowl. Hold it firmly and perfectly upright. Give the top of the stamp one solid, heavy blow with your hammer.
Pro Tip: Avoid “double-tapping” the stamp, as this often causes a blurred or double-imaged letter. One clean strike is all you need.
4. Define the Letters
To make the names pop against the silver, rub a permanent black marker over the indented letters. Let it dry for a few seconds, then lightly buff the surface with a polishing cloth or extra-fine sandpaper. The ink will remain in the grooves while the rest of the spoon shines.
5. The Finishing Detail
For a true “homestead” look, tie a small piece of twine or a scrap of hand-dyed fabric—perhaps colored with onion skins or walnut hulls—around the neck of the spoon.
The Author:
Pioneerthinking.com: Ingredients for a Simple Life. Insights from a seasoned professional rooted in country living, with 28 years of horticulture expertise and over two decades of practical experience in homesteading, natural beauty and cosmetic creations, natural health, cooking and creative living.
Photo. Gemini


