How to Make Wool Dryer Balls

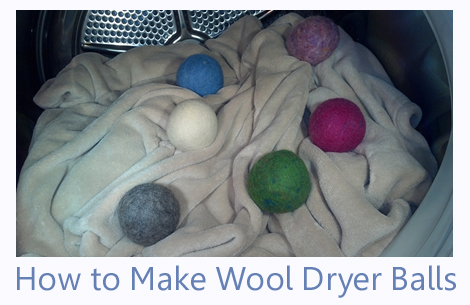
Dryer balls help to cut down on the time your clothes have to spend in the dryer. They help to separate the clothes and eliminate the static. If you do not want to buy them or you want a more natural option, it is simple to make your own. All you need is some wool yarn, or roving, and a pair of panty hose. The wool will mat together in the wash and the fibers will grab themselves, forming a dense, thick felt. The dryer balls are easy to make and will felt more with continuous use.
1. Split the length of wool roving into a few thinner strands.
2. Take one strand of roving and begin wrapping it tightly around your fingers.
3. Take the wool off your fingers and start wrapping around the bundle as if you were making a yarn ball.
4. Continue wrapping the roving until the core of the ball is at the desired size. Do not let go yet.
5. Take a piece of the wool yarn and wind just enough around the roving to secure it. Pull the end under a strand of yarn a few times and tie it.
6. The ball should now look like this.
7. Begin by tightly wrapping one end of the yarn around your fingers.
8. Take the loop off your fingers and begin wrapping a very tight yarn ball.
9. Wrap until the core is big enough for your liking. Thread the end of the yarn into the eye of the tapestry needle, push under multiple strands and tie to secure.
10. Continue making balls until you have as many as you want.
11. Place the balls in the panty hose and tie a piece of the acrylic yarn on the side of each ball. You must use acrylic or some other synthetic yarn because this is not supposed to felt.
Toss the entire panty hose into the washer and dryer. The hotter the water and the hotter the dryer is, the faster the wool will felt. If washed along with a regular load of laundry, they will also felt but may take longer.
12. Cut the yarn off the pantyhose and take out the wool balls. They will continue to felt with use over time.
13. Continue to cover the core with your choice of roving and/or yarn until they reach your desired size. Remember to make them slightly bigger because they shrink a little bit when felted.
14. Place the balls back in the stocking the same way you did before and throw in the washer and dryer one more time.
15. When they are dry, cut the yarn and take out of the pantyhose. The balls are finished and ready for use.
The Author:


