How to Make Beeswax Bowl Covers
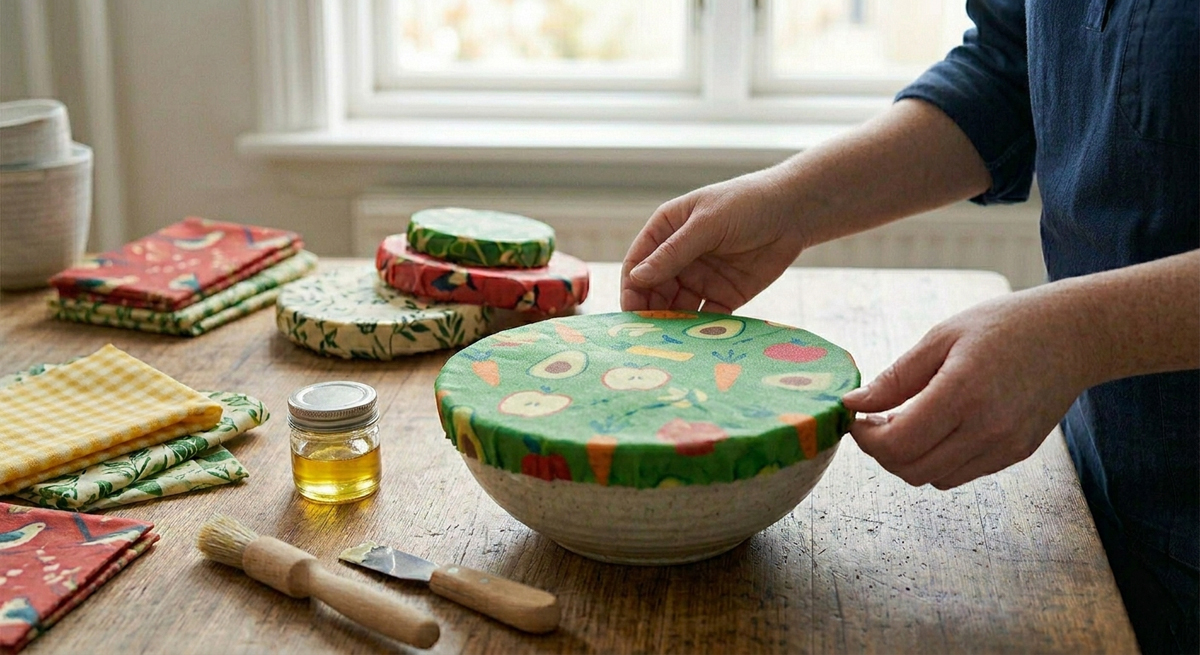
Looking for a simple and useful craft project? Beeswax bowl covers are a fantastic option. These versatile covers are made from natural materials and are a great way to keep food fresh. They’re not only reusable and durable but also surprisingly easy to make.
Beeswax Bow Covers
Materials:
- 100% cotton fabric
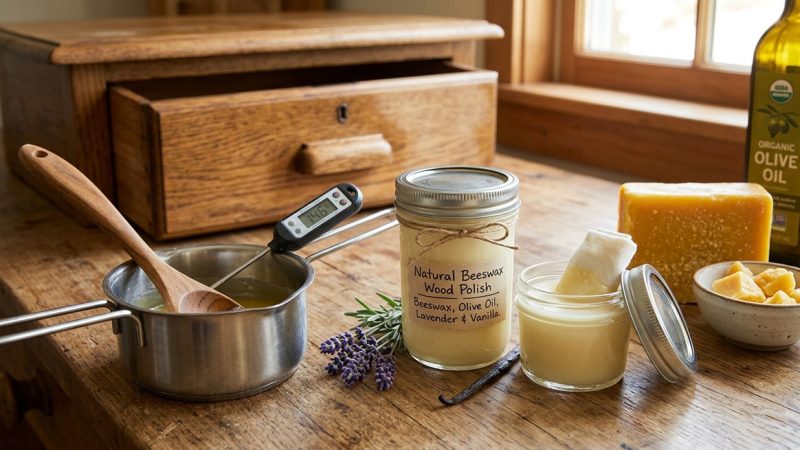
- Beeswax
- Jojoba oil
- Baking paper
- Scissors
- Ruler
- Pencil
- Grater
- Iron
- Oven tray
- Paintbrush
Step-by-step tutorial:
Cut the fabric into the desired size. A good size for a bowl cover is 30cm x 30cm. Use a ruler and a pencil to mark the fabric before cutting.
Grate the beeswax and place it in a mixing bowl.
Add a few drops of jojoba oil to the beeswax and mix well.
Preheat the oven to 150°C.
Place the fabric on a baking paper-lined tray.
Brush the beeswax mixture onto the fabric. Make sure the beeswax mixture covers the fabric evenly.
Put the tray in the oven for 5-10 minutes until the beeswax melts into the fabric.
Take out the tray from the oven and let the fabric cool down.
Once the fabric has cooled down, peel it off the baking paper.
Shape the beeswax bowl cover around the bowl or dish you want to cover. Use your hands to press the fabric down to create a seal.
Alternative method:
If you don’t have an oven, you can use an iron to make the beeswax covers. Here’s how:
Grate the beeswax and mix it with a few drops of jojoba oil.
Place the fabric on a baking paper-lined tray.
Brush the beeswax mixture onto the fabric.
Put another piece of baking paper on top of the fabric.
Use an iron on low heat to melt the beeswax onto the fabric. Make sure to iron out any wrinkles or bumps.
Peel the baking paper off the fabric once the beeswax has melted.
Shape the beeswax bowl cover around the bowl or dish you want to cover. Use your hands to press the fabric down to create a seal.
The Author:
Pioneerthinking.com: Ingredients for a Simple Life. Insights from a seasoned professional rooted in country living, with 28 years of horticulture expertise and over two decades of practical experience in homesteading, natural beauty, natural health, and creative living.
Photo. Gemini
Before Beeswax: How Pioneers Stored Their Food
by pioneerthinking.com
Long before we could simply wrap a bowl and pop it in the fridge, or even buy glass Mason jars, pioneer families had to rely on a collection of clever, labor-intensive techniques to survive the winter. They didn’t just worry about keeping leftovers fresh for a few days; they had to preserve entire harvests and butchered meats to last six months or more. Their methods leveraged natural elements—earth, salt, smoke, and air—to create clever food storage systems.
1. The Root Cellar: Earth’s Natural Refrigerator
The most essential storage space on any homestead was the root cellar. This was often a small underground room, or a space dug into the side of a hill, designed to keep food dark, cool (ideally 32°–40°F), and humid. This environment was perfect for slowing down spoilage and preventing withering in root vegetables.
- What was stored: Potatoes, carrots, turnips, beets, parsnips, and cabbages were layered in barrels or crates, sometimes insulated with straw or sawdust. Apples and squash could also be kept on shelves, though they were often separated, as the gases they emitted could hasten the decay of other vegetables.
2. The Smokehouse: Curing Meat
Without refrigeration, preserving meat was a major challenge. Butchering was typically left to the cold winter months, but the meat still had to be treated for long-term storage. The solution was curing, which often combined two powerful preservation tools: salt and smoke.
- How it worked: Meat, such as hams or bacon, would first be heavily salted (or “cured”) in a brine solution or by being rubbed with dry salt to draw out moisture and kill bacteria. Then, it would be hung in a small, tight building called a smokehouse. A low, smoldering fire of hardwoods (like hickory or apple) would be kept burning for days. The continuous smoke dried the meat further, added flavor, and deposited natural chemical compounds that discouraged insects and decay.
3. Drying, Salting, and Pitting
Pioneers used every method available to reduce moisture, which is the key to preventing bacterial growth.
- Drying: Fruits and vegetables like apples, pumpkins, and green beans (called “leather britches”) were often sliced thin, threaded on strings, and hung up near the fireplace or in a warm, dry attic to dehydrate. Corn was a vital crop that was dried on the cob and stored in ventilated “corn cribs” or shelled and ground into cornmeal.
- Salting: Meat was often simply “salt-cured” and stored heavily packed in salt inside wooden barrels, which effectively drew out all moisture, creating a product like salt pork.
- Pitting/Burial: In areas without a built cellar, pioneers might construct “cache pits”—holes dug into the cool ground, lined with straw and covered with more earth and mulch—to create a temporary underground storage spot for vegetables.
4. The Spring House and Ice Shed
For dairy products like milk and butter, pioneers utilized any available source of cold water or natural ice.
- Spring House: These were small buildings constructed directly over a naturally cool spring or creek. The flowing, cold water would run through stone-lined channels, and dairy containers would be submerged in the water to stay cool through the summer.
- Ice Shed/House: On lucky homesteads, large blocks of ice would be cut from frozen lakes or ponds in the winter. They would be hauled to an ice house, which was usually built partially underground and heavily insulated with straw or sawdust. With a well-built shed, ice could last deep into the warmer months, allowing for a form of true refrigeration.


