Growing Potatoes: A Guide to Enhancing Growth and Yield
Whether you’re a seasoned gardener or just starting out, this guide will help you achieve a bountiful potato harvest. It covers key topics such as soil health, companion planting, managing pests organically, crop rotation, harvesting, seed saving and storage for long-term success.
Planting Potatoes:
Choose a location with loose, well-draining soil and full sun. Cut seed potatoes into pieces with at least 2-3 eyes per piece. Allow the cut seed potatoes to “heal over” for a few days before planting to reduce the risk of rotting. Plant the seed potatoes 4 inches deep and 12 inches apart with the eyes facing up. Cover the seed potatoes with soil, forming a hill around each plant.
Growing Conditions:
Potatoes require consistent moisture, but avoid over watering to prevent rotting. Fertilize with a balanced fertilizer before planting and again when plants are about 6 inches tall. Hill up soil around plants to protect the tubers from sunlight, which turns them green and can cause poisoning. Remove any weeds promptly to reduce competition for resources.
Soil Management
Healthy soil provides the necessary nutrients, water, and oxygen that potatoes need to thrive. Some practices that contribute to good soil health for potato include:
1. Soil Testing – Testing your soil is important to know what nutrients your soil lacks so you can make sure that your potatoes get the proper amount of essential nutrients like phosphorus, potassium and nitrogen.
2. Crop Rotation – Rotating potato crops with other plants can help to break up soil-borne diseases, pests, and reduce potato yield losses due to soil-borne diseases.
3. Organic Matter – Adding organic matter such as compost, green manure or leaf litter, can improve soil structure, fertility, and water-holding capacity.
4. Irrigation – Maintaining proper soil moisture levels through irrigation is critical to promote healthy root development, nutrient uptake, and tuber formation.
5. Soil pH – Potatoes grow best in a slightly acidic soil with a pH range between 5.0 and 6.0. Soil pH can be adjusted by adding lime for acidic soils or sulfur for alkaline soils.
6. Mulching – Applying an organic mulch layer to the soil surface can help to maintain soil moisture, suppress weed growth, and add organic matter back into the soil.
7. Avoiding Soil Compaction – Compacted soils can restrict root growth, decrease water infiltration and increase the risk of disease. Tilling the soil when it is too wet or driving heavy equipment over the field when the soil is too moist should be avoided.
Common Diseases
There are several common diseases that affect potato plants. Here are some of the most common:
1. Early blight: This is a fungal disease that affects the leaves and stems of potato plants. Symptoms include the appearance of dark, circular spots on the leaves that spread over time. The disease can be controlled by regularly removing and destroying infected plant parts, and using fungicides.
2. Late blight: This is a serious fungal disease that can affect potato plants, causing loss of foliage, stem rot and eventual death of the plant. It is especially prevalent in cool and wet conditions. The disease can be managed by practicing good crop rotation, ensuring adequate soil drainage, and using organic anti-fungal sprays.
3. Blackleg: This bacterial disease affects the stems and underground parts of the potato plant. Infected plants may wilt and die prematurely. To prevent blackleg, it is important to use certified disease-free seed potatoes, avoid planting in soil where infected plants have grown before, and practice good hygiene.
4. Potato virus Y: This viral disease can cause stunted growth, leaf curling, and reduced yield. The virus is spread by aphids, so controlling aphids by using sticky traps or insecticides can help prevent the disease from spreading.
Natural controls for potato diseases include companion planting, using resistant varieties, applying organic fertilizers to encourage soil health, and rotating crops. Companion planting involves planting certain plants alongside potatoes to repel pests and diseases. Using resistant varieties can help prevent infections from spreading, and rotating crops can help break the life cycle of pests and diseases. Additionally, maintaining proper soil moisture and temperature, avoiding over-crowding, and providing proper ventilation can help reduce the incidence and severity of potato diseases.
Companion Planting
Companion planting is a great way to help protect your potato plants from pests and diseases while also improving the overall health of your garden.
1. Beans – Beans are one of the best companion plants for potatoes. They have the ability to fix nitrogen in the soil, which is essential for potato growth. Nitrogen is a vital nutrient for potatoes, and beans provide it naturally. Additionally, beans attract beneficial insects like ladybugs, which can help control aphids, a common pest that affects potato plants.
2. Chives – Chives are another great companion plant for potatoes. They repel pests such as aphids, carrot flies, and slugs, which are all common pests that affect potatoes. Chives also have the ability to improve the flavor of potatoes when they are grown together.
3. Marigolds – Marigolds are known for their ability to repel pests and improve soil health. Planting marigolds with potatoes can help repel harmful nematodes, which can cause damage to the roots of potato plants. Additionally, marigolds attract beneficial insects like ladybugs and lacewings, which can help control other pests that affect potatoes.
4. Horseradish – Horseradish is a natural pest deterrent, and planting it alongside potatoes can help protect them from pests such as potato bugs and aphids. Horseradish also has a deep root system that can help break up compacted soil, allowing potatoes to grow more easily.
5. Nasturtiums – Nasturtiums are not only beautiful, but they also have the ability to repel pests such as aphids and potato bugs. Additionally, nasturtiums attract beneficial insects like ladybugs and hoverflies, which can help control other pests that affect potatoes.
Remember to plant these companions near your potato plants, and watch them thrive together in your garden.
Organic Pest Control
Effective ways to manage pests organically for potatoes:
1. Crop rotation: One of the best ways to prevent pests from attacking your potato crops is by practicing crop rotation. This involves planting different crops in the same area each year, which helps to reduce pest buildup in the soil.
2. Soil management: Good soil management practices such as keeping the soil healthy and balanced with organic matter, composting, and avoiding over-fertilization can help to promote strong plant growth and reduce the likelihood of pest attacks.
3. Companion planting: Planting companion crops such as marigold, basil, and garlic along with potatoes can naturally repel pests and improve soil health.
4. Handpicking: Inspect your potato plants regularly and handpick any pests that you find, such as potato beetles, aphids, and caterpillars.
5. Neem oil: Neem oil is a natural pesticide that can be used to manage pests on potatoes. It is non-toxic to humans and animals, and it repels pests by disrupting their feeding and breeding patterns.
6. Bacillus thuringiensis (Bt): Bt is an organic pesticide that is safe for humans and animals. It is a bacteria that produces a toxin that specifically targets caterpillars, which are common pests that attack potatoes.
By using these organic methods to manage pests on your potato crops, you can avoid harmful chemicals and ensure that your potatoes are healthy and safe to eat.
Crop Rotation
Potato crop rotation is an effective strategy that can help nourish the soil and control pests. Here are some steps that can be taken when implementing crop rotation for potatoes:
1. Choose your crop sequence: The first step is to determine the crops to rotate with potatoes. Some good choices include cereals, beans, and leguminous plants like alfalfa, clover, or peas. For instance, a typical 3-year cycle might include potatoes in year one, followed by wheat or corn in year two, and then legumes in the third season.
2. Plan your land usage: Once you have selected the crops you want to include in your rotation cycle, decide how to distribute them across your land. You can divide your arable land into blocks, segments or fields and assign each crop rotation sequence to a specific block.
3. Monitor your soil: Crops like potatoes are known to deplete the soil of nutrients, so it’s vital to monitor the nutrient levels of your soil. By monitoring soil fertility, you can design an appropriate crop rotation plan that ensures that the soil’s nutrient levels remain optimal.
4. Manage pests: Crop rotation can also help reduce pest and disease problems. A healthy crop rotation scheme can break the lifecycle of pests since different crops have different nutritional demands, which pests cannot sustain.
5. Record your crop rotation plan: Keeping records of your crop rotation system is essential. It helps you keep track of which crops were grown in each field, adding fertilizers or other amendments, and noting any issues encountered during the growing season.
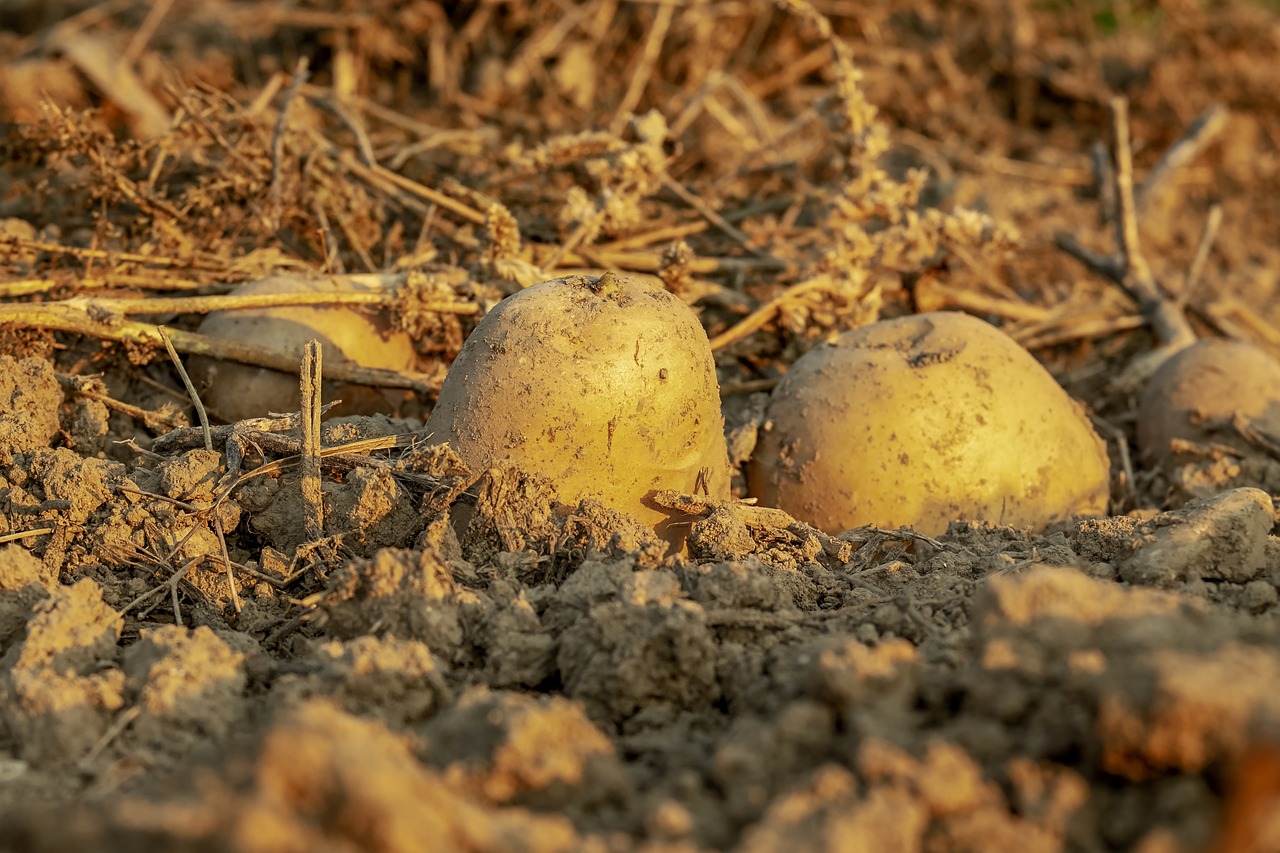
Harvesting:
Harvest potatoes when the foliage turns yellow and begins to die back. Use a spade or pitchfork to gently lift the tubers from the soil. Allow them to dry in a cool, dark place for a few days to allow the skins to toughen up. Do not wash the potatoes until you are ready to use them, as this can make them more prone to rotting.
Storage:
Store potatoes in a cool, dark, well-ventilated area, such as a root cellar or basement. Avoid storing potatoes near apples or other fruit, which release ethylene gas that can cause potatoes to sprout. Check potatoes regularly for signs of decay or sprouting, and remove any damaged ones promptly.
Seed Saving:
Choose healthy potatoes from disease-free plants for seed saving. Store the seed potatoes in a cool, dry place until planting time. Leave a few potatoes in the ground to produce new plants the following year. Allow these plants to mature and flower, and then collect the small, round seed pods that form. Dry the seed pods and remove the seeds for planting the following year.
Enjoy your spuds!
The Author:
Pioneerthinking.com: Ingredients for a Simple Life. Insights from a seasoned professional rooted in country living, with 28 years of horticulture expertise and over two decades of practical experience in homesteading, natural beauty and cosmetic creations, natural health, cooking and creative living.
Photo. Couleur