Five Outdoor Activities for The Entire Family to Enjoy
The kids are home… it’s a beautiful day outside… it’s time to get crafting! Let’s start the craft ideas countdown!
It’s Time to Rake Leaves!
Just joking, but you do need to find a few really cool ones! This craft project is all about print making using leaves in all sizes and shapes as stamps. From the house you will need: paper towels, Styrofoam plates, colored construction paper, and various colors of craft paint.
First fold a paper towel in fourths then place it on a Styrofoam plate. Pour enough paint into the center of the towel to make it into a stamp pad. Repeat this step with additional paint colors to add to your stamping color palette.
Dip the back side of a leaf into the paint to lightly cover it. Press the leaf onto a piece of paper gently pulling it off when done. Add more leaves to your picture until you are satisfied with your design. Once dried you can frame it, make it into a card, use it for wrapping a present, or cut it up for use in a collage.
Another idea: use fabric paint for imprinting your leaves on t-shirts, ball caps, kitchen towels and more!
Pine Cone Bird Feeders
This is a fun and very easy family craft. What you need are pine cones, peanut butter, wild bird seed, twine, a shallow plate, newspaper and a wood craft stick for each family member.
First cut a piece of twine 3 to 4 feet in length. Tie it to the top of a pine cone to make a hangar. Smear peanut butter over and into the pine cone. Pour birdseed into the shallow plate and roll the pine cone over the seeds until covered. Set the seeded cones aside on a piece of newspaper until ready to hang in a tree.
Note: Some crafters like to place the finished pine cones into the freezer for an hour before hanging them in a tree. This helps bind the seeds and the peanut butter together (optional).
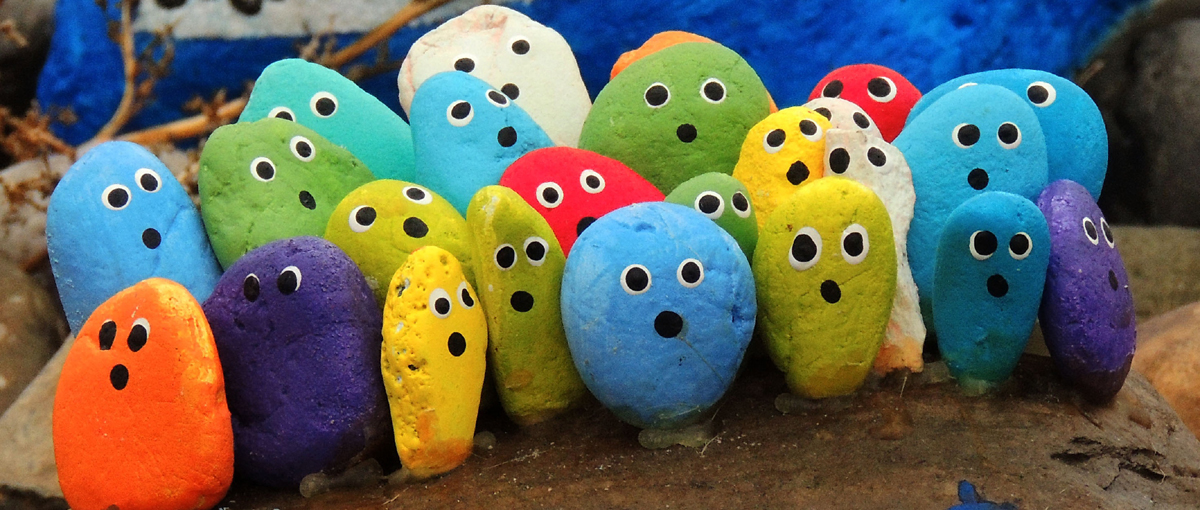
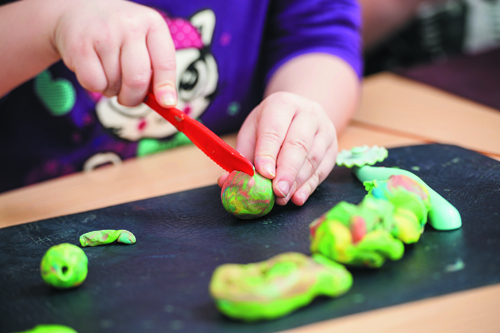
Pet Rocks
This is a great family craft that will encourage not only creativity but a lot of laughs! First go on a backyard hunt for a bunch of various sized rocks (golf ball sized work well). I like to use smoothed faced rocks that can easily be painted.
Gather up some crafting supplies including paint and/or paint pens, yarn, chenille stems, ribbon, feathers, buttons, beads, pom-poms, wiggle eyes, felt, glitter, and craft foam (basically anything that you and the kids would like to use to create your pets). You will also need the basic tools like glue, scissors, paint brushes, and paper towels.
First scrub your rocks of all dirt and grime. Once dry choose and organize the rocks you will want to use for your pets head, body, feet, and so forth.
Starting with your pets’ head make its’ little face. Wiggly eyes, a fuzzy pom-pom nose, a painted or yarn mouth are all great ideas. Add some chenille stems or feathers for hair, a few painted freckles, and maybe even ears. Once finished glue the head to its body and let dry until completely adhered.
Now decorate the body, add the feet and hands if desired and decorate those too. Have fun creating your pets and have fun being together crafting.
Make a Toad Village
Giving toads and frogs a hiding place in your garden is not only fun but it also is a great way to help control flies and mosquitoes. Gather up a few flower pots and/or empty coffee cans, paint primer (for metal coffee cans), outdoor paint, clear acrylic paint for sealing, and any small decorative items you might want to add to your houses like marbles, broken ceramic or stained glass pieces, any items that can be used outside that are interesting or fun.
Start by making sure your pots and cans are thoroughly cleaned and dry. If using coffee cans paint them with primer and let dry. Use outdoor paint in your choice of colors to create your toads abode. Paint on little windows and doors, a tiled roof, and flower boxes are a few ideas for you to use. Another idea for your village is to mosaic the flower pots using ceramic and glass pieces. Once finished give your house a couple of coats of the clear acrylic paint and let dry.
Bury your coffee cans on their sides half way down into the dirt to keep them from rolling away while giving your toads the dirt floors they love. Set the flower pots upside down on the ground then raise up one side using a rock to hold it in place. This gives the toads an entryway into their new home. To add more fun, detail your toad village to include little roads between the houses, make little entry way signs, pebble walkways, add a few small plants, and even a few little toy cars and people would be cute. Make it a place for toads and children to play.
Hand-Print Stepping Stones
This is my favorite family craft. Creating personalized stepping stones embedded with hand-prints or footprints are so fun to make and can last a lifetime. There are several methods of making your own stepping stones but the easiest by far is using the stone topper method. You use a pre-made garden stone and top it with cement mortar using duct tape to hold it in place. Since there are no kits to buy you can decorate the stones anyway you would like allowing your children to use their wonderful imaginations to come up with unique designs. This is a great project for even parents to imprint their own hand and/or foot prints. Kids have a blast measuring their growth every year to their parents’ prints.
It’s also fun to include the pet’s prints into stepping stones. You just might just want to create a whole pathway of personalized stones.
I hope this has given you some great ideas and projects for your family crafting activities. There is nothing more memorable than the times we spend sharing our days with our children. Crafting projects that can be kept for years to come add to the enjoyment of reunions where their memories can be relived once again.
The Author:
Rita Wise, Creative Director of Stained Glass Cobbles and Optimum Art Glass, is a freelance writer and creative intuitive working primarily in the arts and crafts market. She specializes in creating new applications for existing products combining usefulness with artistic attitude. For more crafting ideas be sure to check out my blog at http://stainedglasscobbles.wordpress.com


