Pressure Canning Food
The basic principle of canning is to expose the food to a high temperature, that will stop decay and bacteria in the food. Sterile, airtight containers, generally glass jars with removable seals and ringed bands, are used to package the food, and then they are exposed to a high temperature, either through pressure canning or using a water bath canner. Tools such as a rack and tongs are universal to both methods of canning.
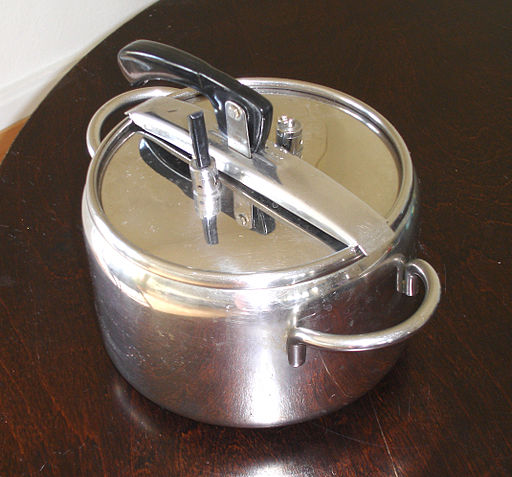
Except for size, a pressure cooker and a pressure canner are the same thing. Pressure canning can be done in both a canner and a cooker. The key to deciding whether to use a canner or a cooker is in determining both your canning and cooking needs. A pressure cooker will limit the amount and size of jars you can preserve at once.
To give you an idea, a typical pressure cooker, about 6-8 quarts, will hold 2-3 pint size jars. This would translate into about 14-20 batches if you were processing forty pounds of tomatoes.
A mid sized compromise, if it is important for you to use a pressure cooker so as to have it for cooking too, is about a 10 quart cooker. Keep in mind, this is only a compromise if you cook a lot with a pressure cooker. If you don’t, you might consider getting a canner over a cooker.
The best size, if you’re main use is canning, is a 22-23 quart canner, which is typically around the same price as a 16 quart canner. They allow you to hold more jars, both pint and quart size, minimizing your time and effort in the process. It should also be mentioned that processing times are calculated using a full size canner. This is important because food canned in a cooker will cool down faster than food canned in a canner, which means the process will be less effective. It is possible to use a pressure cooker, but there is no formula for adjusting the difference in cook times due to size. Whatever size you need, a Presto pressure cooker is one of the best options available.
Once you are prepared to start pressure canning, follow these steps:
- Put 2 to 3 inches of hot water in the canner and place filled jars on the rack being sure to use a jar lifter, and fasten the canner lid securely.
- Don’t put the weight on the vent port or open petcock yet. Heat at the highest setting until steam flows from the vent port, or petcock.
- Maintain the high heat setting, exhaust the steam for ten minutes before placing weight on vent port of closing petcock. It will take 3-5 minutes for the canner to pressurize.
- Once the dial indicates the recommended pressure has been reached, or when the weighted gauge begins to jiggle or rock, start timing the process.
- In order to maintain a steady pressure, either at or just above the correct pressure gauge, regulate the heat underneath the canner. Avoid letting the pressure reading go below the recommended pressure, or you must bring the pressure back up and start timing the process all over again.
- Once the process has reached the completion time, turn off the heat or remove the canner from heat, and let the canner sit at room temperature to depressurize. You will know by the dial moving back to zero or there are no steam sounds when you gently nudge the weight. Don’t force the canner to cool by releasing pressure or placing the canner under water as it will result in under processing. This could also cause jars not to seal and a loss of contents from the jars. Quick cooling can also damage the canner lid, especially on older models.
- Once the canner is properly depressurized, open the petcock or remove the weight from the vent port. Wait for two minutes, unfasten and remove the lid. Lift the lid carefully away from you so as not to burn yourself with steam.
- Using a jar lifter, remove the jars and place on a cooling rack or towels. Avoid setting jars on a cold surface or exposing them to breezy conditions.
If you choose your equipment and tools carefully, you will have many years of successful pressure canning food.
The Author:
http://www.urbanhomesteadingtoday.com is a website that is focused on urban homesteading today and the topics relevant to how to develop your own homestead. It is a place where you can join the journey, and learn to become more self reliant and less dependent on our currently over taxed support systems.
Photo Credit: LucaLuca
Article Source: http://EzineArticles.com
