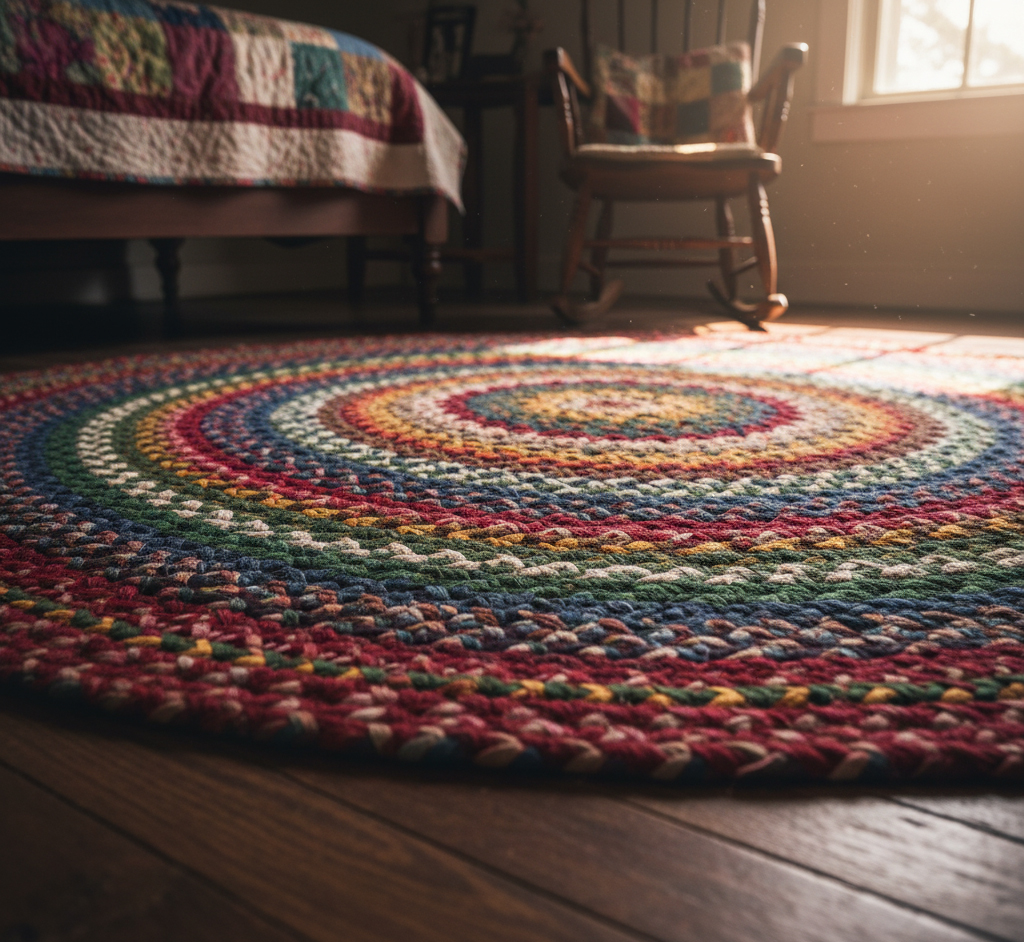
Braided Rugs: Passing Warmth from Soul to Sole
Home-made quilts, and braided rugs. If there were a list of the most American of all American art forms, surely these two items would be near its top.
Often fashioned, literally, from the clothes off the backs of the families who used them, quilts and braided rugs were some of the most personal of heirlooms and, if wear and tear allowed, were handed down through the years.
It’s a comforting thought; sleeping at night curled up under the same quilt that kept your forebears warm, and feeling the same rug, when you get out of bed, warming the soles of your feet.
And while the necessity for recycling the family wardrobe into floor covering may have disappeared, the fun of it still remains. If you’d like to keep family memories alive and warm, why not weave them into a braided rug?
You can either bring your prepared clothing scraps to a braided rug maker, to incorporate into a rug for you, or, for a genuinely from-the-heart heirloom, create the rug yourself.
In choosing the clothing to fashion into your braided rug, stay with woolens which are not too badly worn. Cotton is too rigid to braid well, and synthetics like nylon don’t have enough substance to hold up underfoot as a braided rug.
Gather up old coats, bathrobes, dresses and skirts, slacks and blazers, and even blankets. Cut away any threadbare patches, and stay away from those loosely woven wool fabrics which tend to unravel. Then cut the fabrics into strips about two inches wide, fold the raw edges under, and begin to weave three of them into a braid.
When you have braided to within three inches of end of the shortest strip, slide a new strip of fabric inside the end, roll the two strips into one, and continue to braid. Repeat this step every time you come to within three inches of the end of one of the strips, until you have a braid measuring the final length of your braided rug minus its final width.
Now you are ready to shape your braided rug, so decide if you want a circle, or oval, and position the braid accordingly. Place the braid on a hard surface, and mark its end with a safety pin, from which you double it back on itself, keeping both sections as flat as possible and forming a curved corner.
With a large-five to six-inch-doll needle, start at the safety pin, and, with waxed beading cord, sew the braid together. Weave the cord in and out of the inside loops-not through the fabric-drawing the loops together and continuing to shape the braided rug.
Complete your braided rug by attaching new braids to it and lacing their loops to the loops on the rug’s body, until it reaches the finished size. If your rug, at some point, no longer lies flat, unlace the braid you are attaching until you are at a point before it began to become uneven, and start over.
When you’ve reached the end, using an over-and-under stitch, attach the individual pieces of the final braid into the braided rug for about a foot, and then stitch the completed part of the final braid into as tight a point as you can, and attach it to the body of the rug.
And there you have it-the clothes that have been keeping the family warm will, in your braided rug, continue warm its feet, for generations to come!
The Author:
Matt Garrett – © 2007
Photo. Gemini
Source: EA

