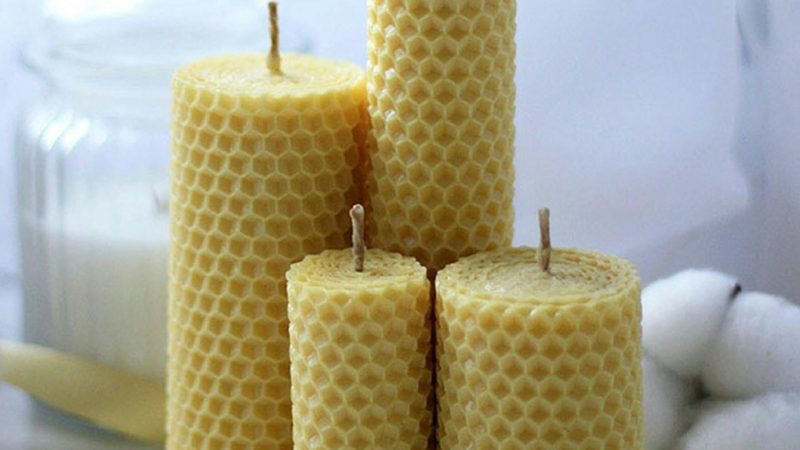
The Candle: How to Make a Votive Candle
I’m going to show you how to make a votive candle, step by step, using paraffin wax. All of the steps for making a paraffin based wax votive candle, are similar for making a votive candle using different types of wax. The biggest differences are the melt point temperatures. When done, you will have a beautiful votive candle.
What You’ll Need:
Votive Molds
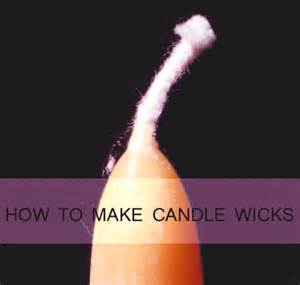
Wick
Paraffin Wax
Double boiler for melting the wax
Pot for pouring the wax into the candle molds
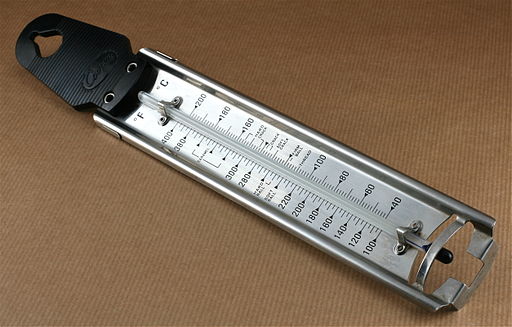
Candy thermometer
Scent (optional)
Color (optional)
Wax paper (optional)
Heat
Many of these items can be purchased at your local craft store. If you don’t have a craft store close by, you might want to try Candlewic, Candlechem, or any other store that comes up using “candle making supplies” in your search engine.
Where to Start:
Decide how much of the candle wax you’ll need based on how many votive candles you want to make. My votives weigh approximately 2.2 oz when they are completed. So figure you will get 7 – 8 votive candles from 1 lb. of wax.
Put water in the bottom part of the double boiler, put the top pan of the double boiler on the bottom pan, and add the wax to the top pan. I would start with a moderate heat temperature and watch how the wax melts. If it’s going very slowly, turn the heat up a little. If it’s going very rapidly, turn the heat down a little. Never leave the melting wax unattended.
I prefer using a glass top electric stove for melting wax. Wax does not boil when it gets too hot, it simply turns into flame. I’m not a fan of melting wax using an open flame.
What to do while you’re waiting for the wax to melt:
Have all the other components close by when you start melting the wax, and then get them setup. I use wax paper to cover my counter or work area. If any wax spills, it makes for an easy cleanup.
Space the votive molds out on your wax paper. Leave space in between them. If they’re touching, the wax from the 2 molds can harder together, making an imperfect candle.
Get the wicks, color and scent set aside, close by, so they’re ready to use.
Color and Scent:
When the candle wax is melted, check the temperature of the wax with the candy thermometer. (Remember, paraffin has a flash point of 375 , so never leave it unattended.) Every paraffin wax has a different melt point. Check with the manufacturer for the correct pouring temperature.
Once the wax is close to the correct pouring temperature, measure out the amount of color that you will use and add it to the wax. Gently stir the wax to make sure the color is distributed evenly.
The scent is the last thing that you will add, since you don’t want it burning off while you’re waiting for the wax to melt. Measure it out and add it to the melted wax. Again, gently stir the scent into the wax. Now you’re ready to pour!
When to Pour The Wax:
Wear protective clothing and eye gear. Carefully and slowly, pour the candle wax into the votive mold. Only fill it to where the lip starts to curl out. Wax gets smaller as is cools, so you will add a 2nd pour to fill it up.
The Wick:
I use zinc cored wicks for my votives. They stand straight and already have a wax coating so they are ideal for votives. (There are other ways to insert a wick, but that’s for another day.) Allow the candle wax to cool a little bit. Put the votive wick into the center of the votive mold.
As the wax starts to cool, a thin film will start to form on the top of the wax. When you see this film, recenter the wick again. Wait about an hour and recenter the wick yet again. As the wax cools, it compresses and sometimes pulls the wick down with it. Give the wick a firm tug to straighten it back out, but be careful that you don’t pull it out completely!
Let the wax cool completely.
Fill it Up:
Reheat the wax to pouring temperature. While the wax is heating, check to make sure the candle wicks are centered. Gently and slowly, pour the wax into the top of the votive mold. I like to almost overfill it, so the votive gets that classic mushroom top.
Allow the wax to cool completely.
Finally:
Once the mold and wax are completely cool, the candle should slide right out of the mold because of shrinkage. If for some reason it doesn’t, stick it in the refrigerator for a few minutes. It should pop right out.
And there you have it, your completed votives. Enjoy the candle and happy candle making!
The Author:
Sue Lichtenberg is the resident expert candle maker at The Cranberry Barn. She has been creating candles since she was a young girl. The candles from The Cranberry Barn are all handmade by Sue, so the attention to detail is exceptional. Please visit our website and signup to receive our latest promotions: The Cranberry Barn Made in the Hudson Valley – where county charm meets quiet sophistication.
Photo. sms1989

